Veröffentlicht am Schreibe einen Kommentar

How to make mini Christmas Ball Ornaments – Holiday DIY Crafts

DIY mini christmas balls ornaments

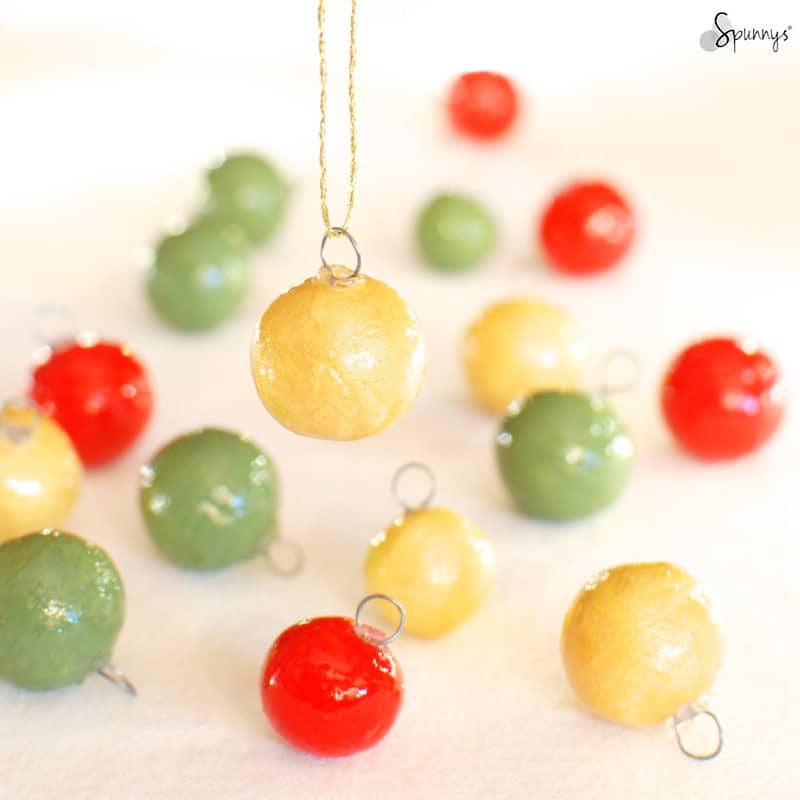
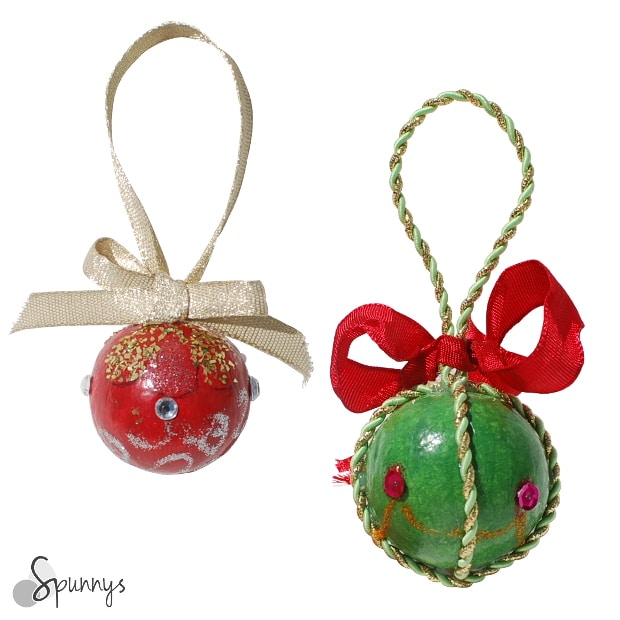
Check out our tutorial and learn how you can make your own mini Christmas Ball Ornaments using spun cotton balls as lightweight / shatterproof fillers. Miniature ornaments are perfect to decorate small size Christmas trees or to make your own wreaths.

Mini Christmas Ball Ornaments Tutorial – The short version

To make one mini ball ornament, follow these three easy steps:

(1) Paint a spun cotton ball
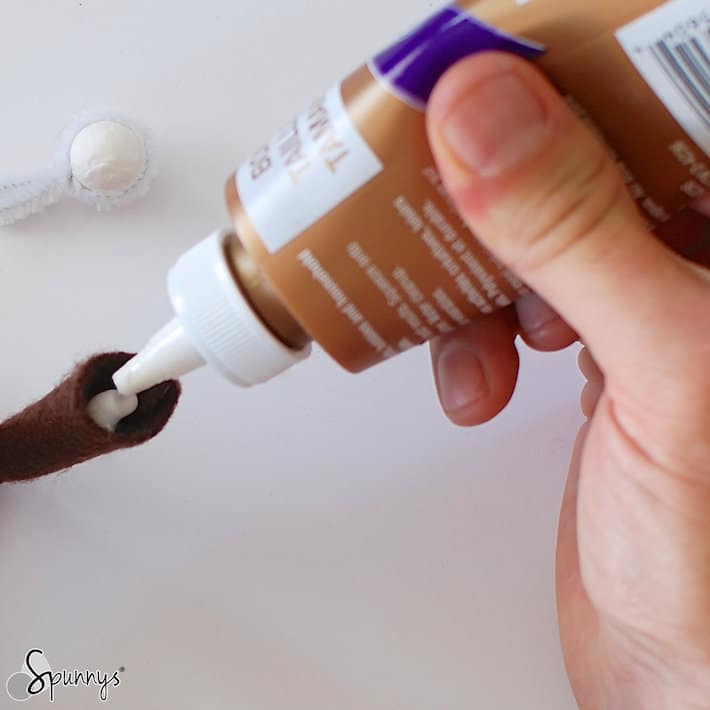
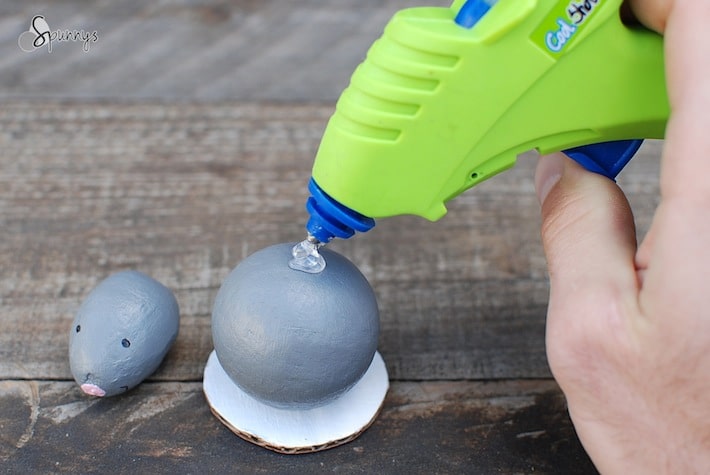
(2) Pour glue in the hole
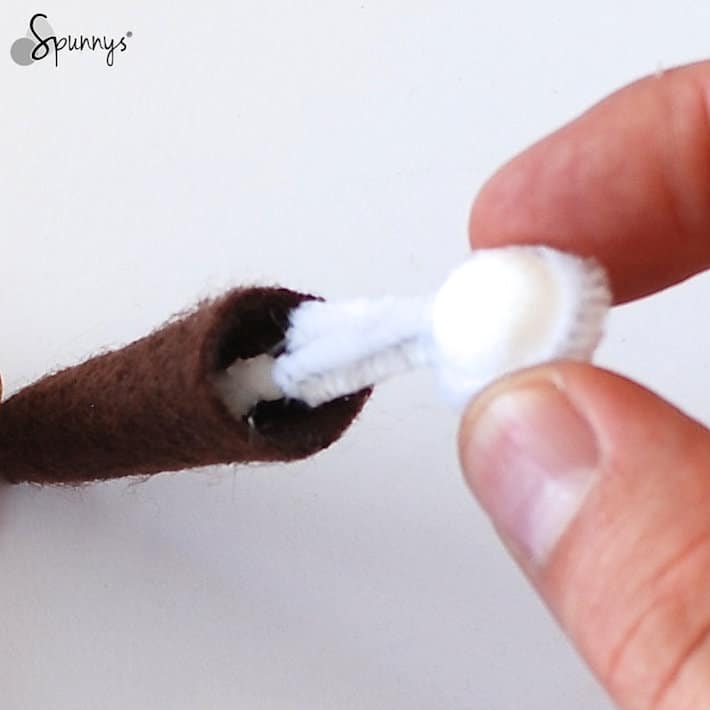
(3) Insert a metal loop.

Tutorial – The long version
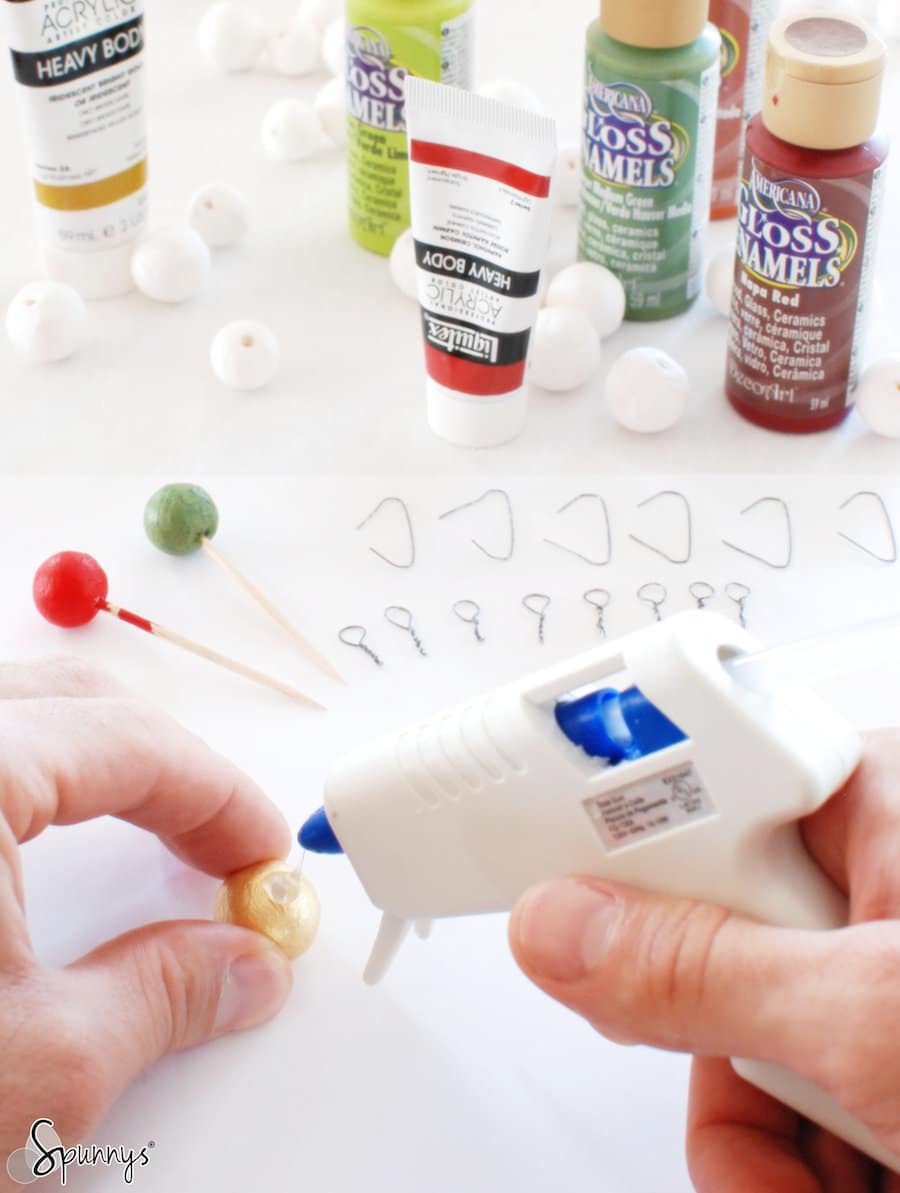
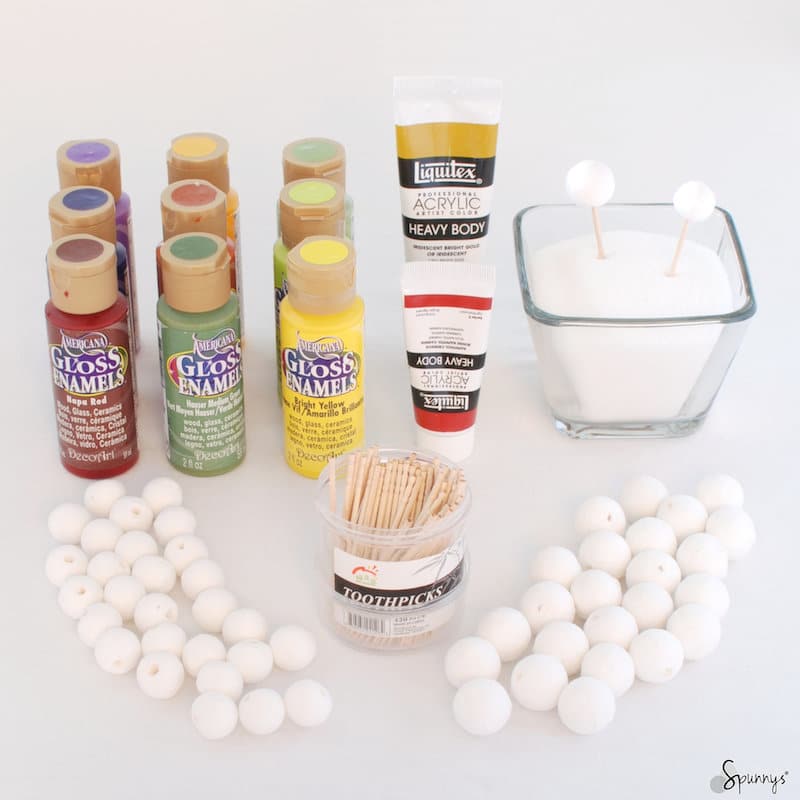
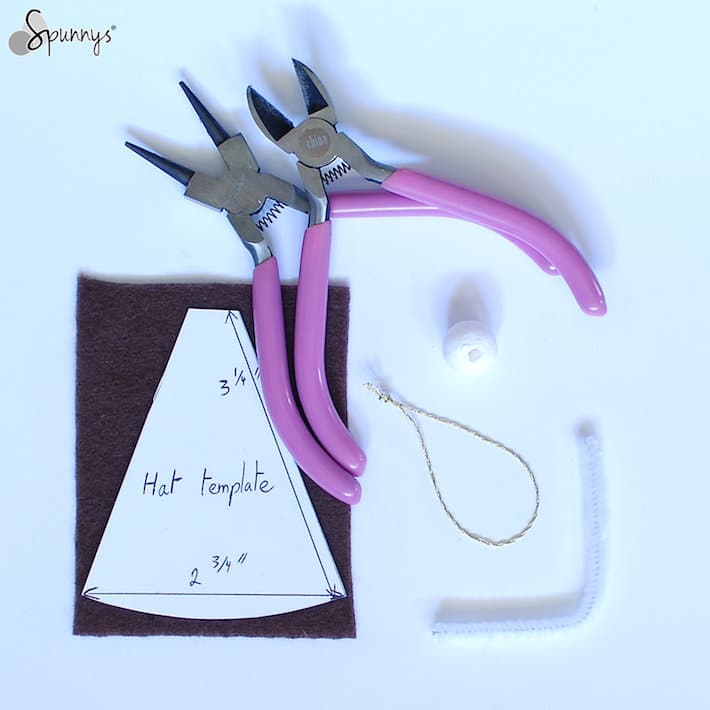
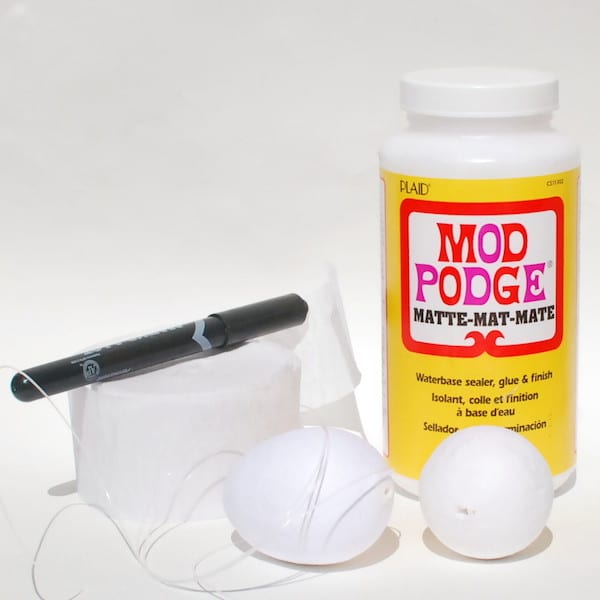
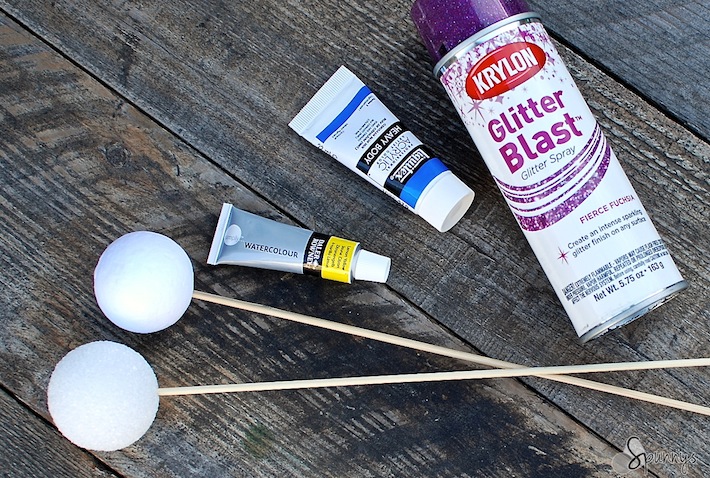
Materials:

To make mini Christmas ball ornaments, you will need:

– Small gauge metal wire or a pack of ornament hooks.
– A pair of wire cutters and a pair of round nose pliers.
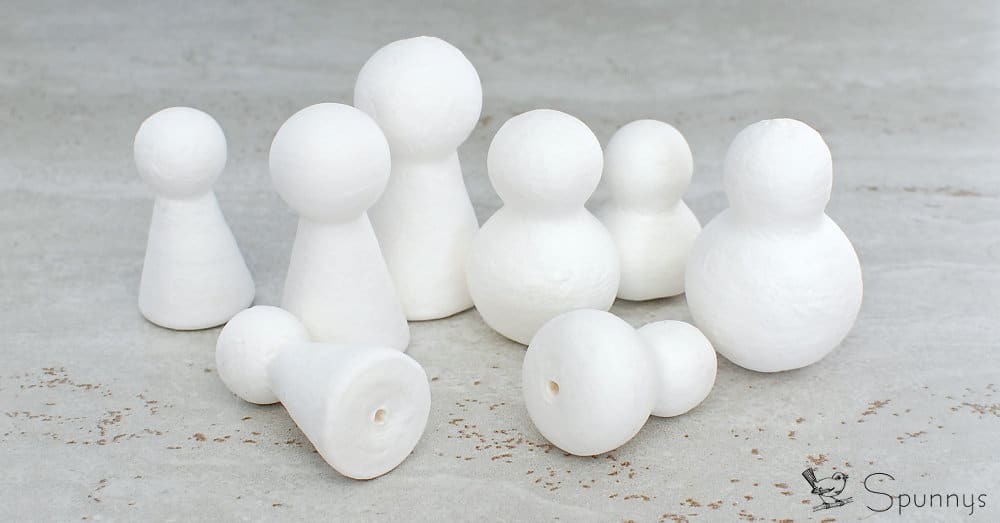
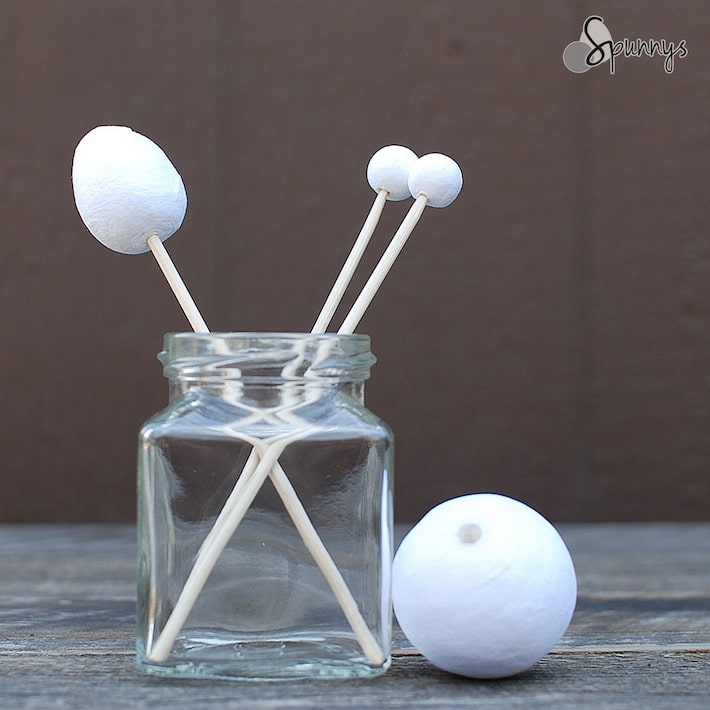
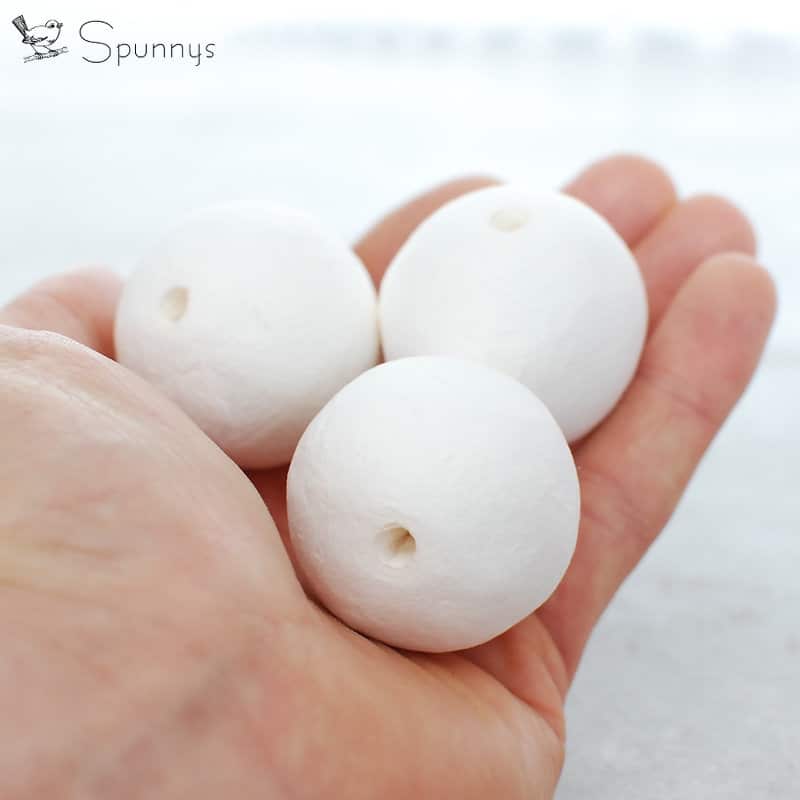
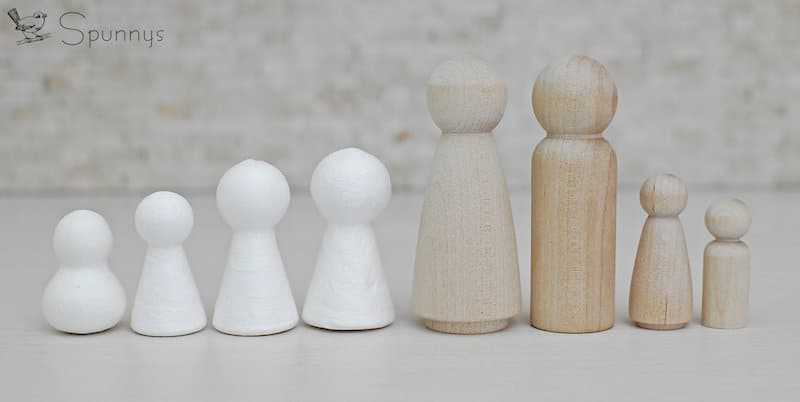
– 18mm and 20mm Spun cotton balls.
– Paint and a paint brushes.
– Toothpicks.
– A glue gun or some regular white craft glue.
– A glossy finish such as glossy mod podge
– OPTIONAL : glitter
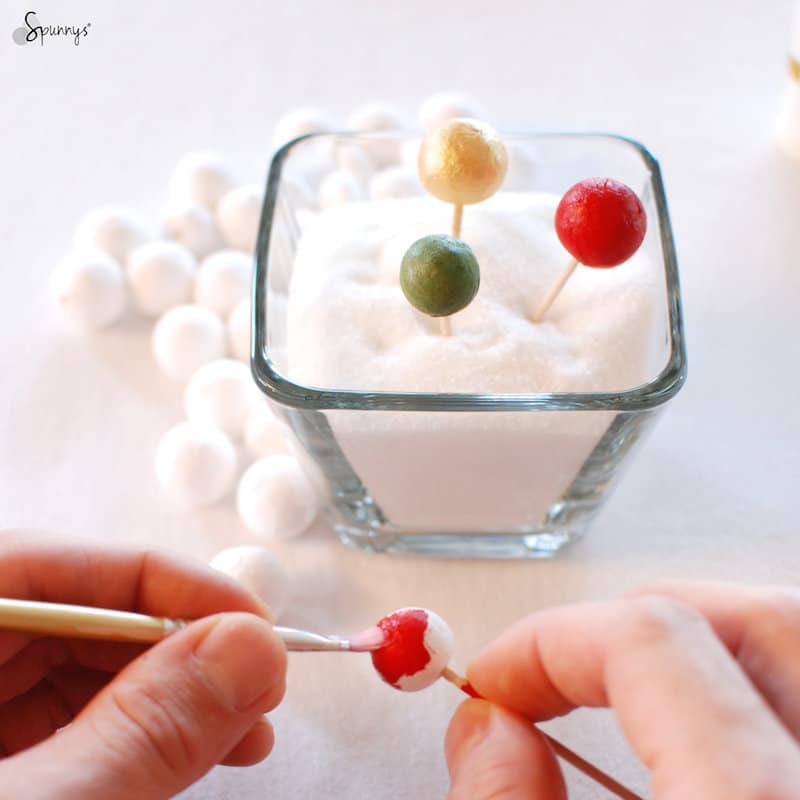
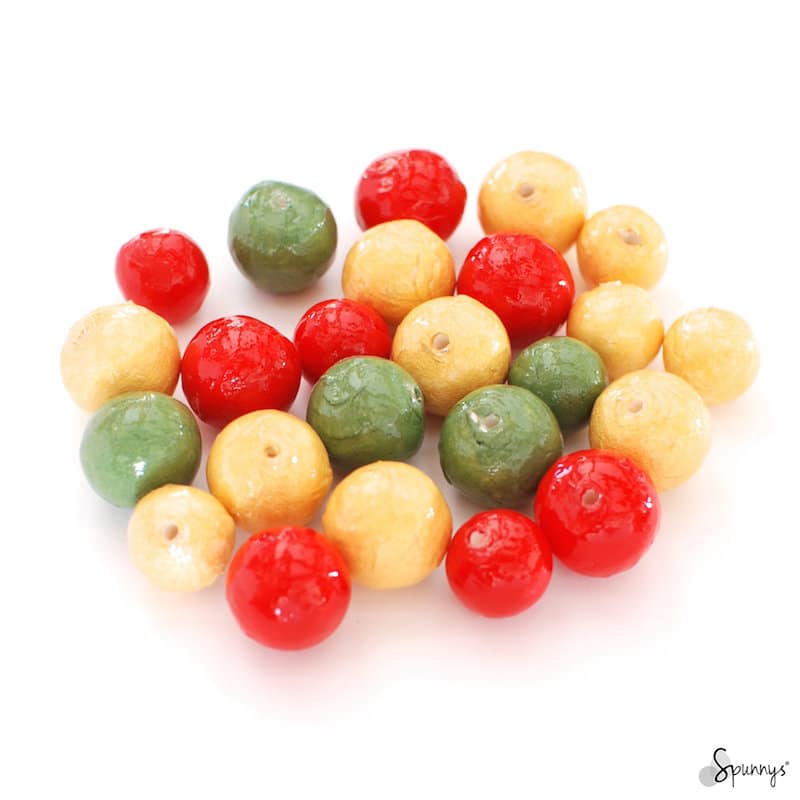
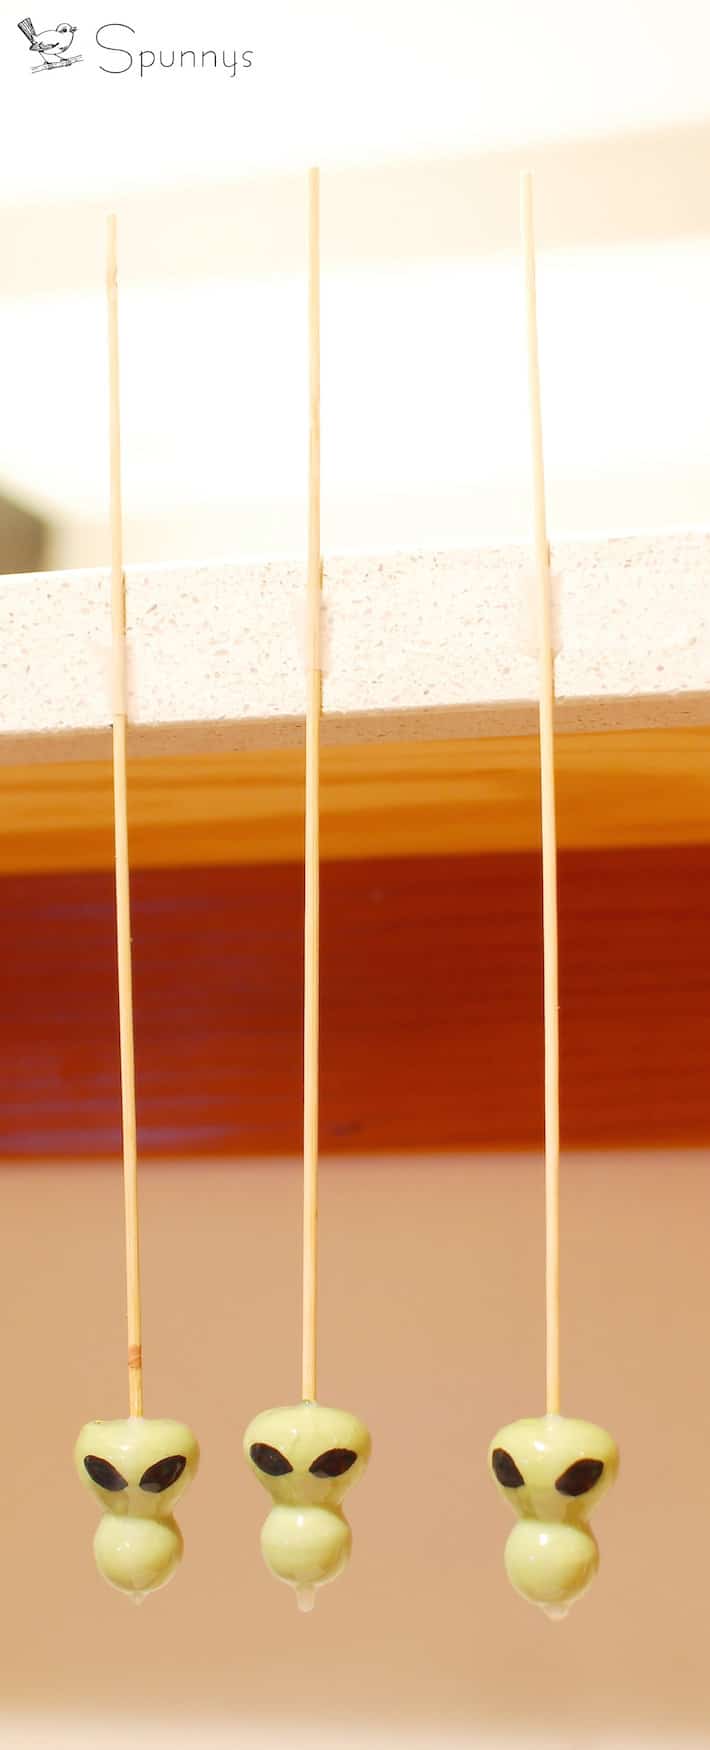
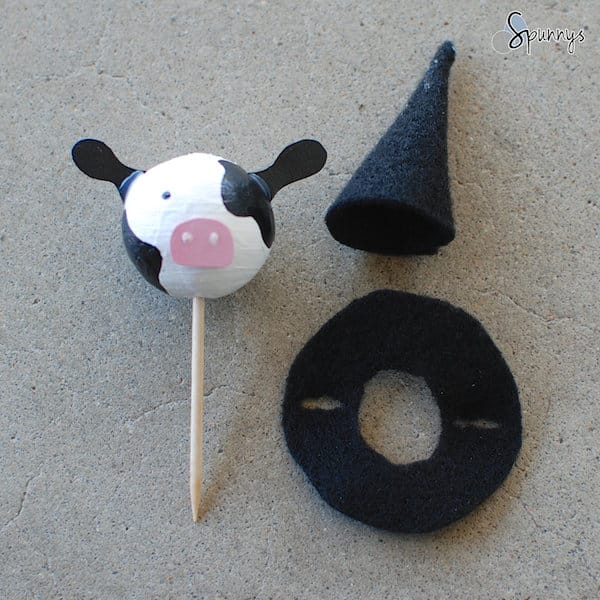
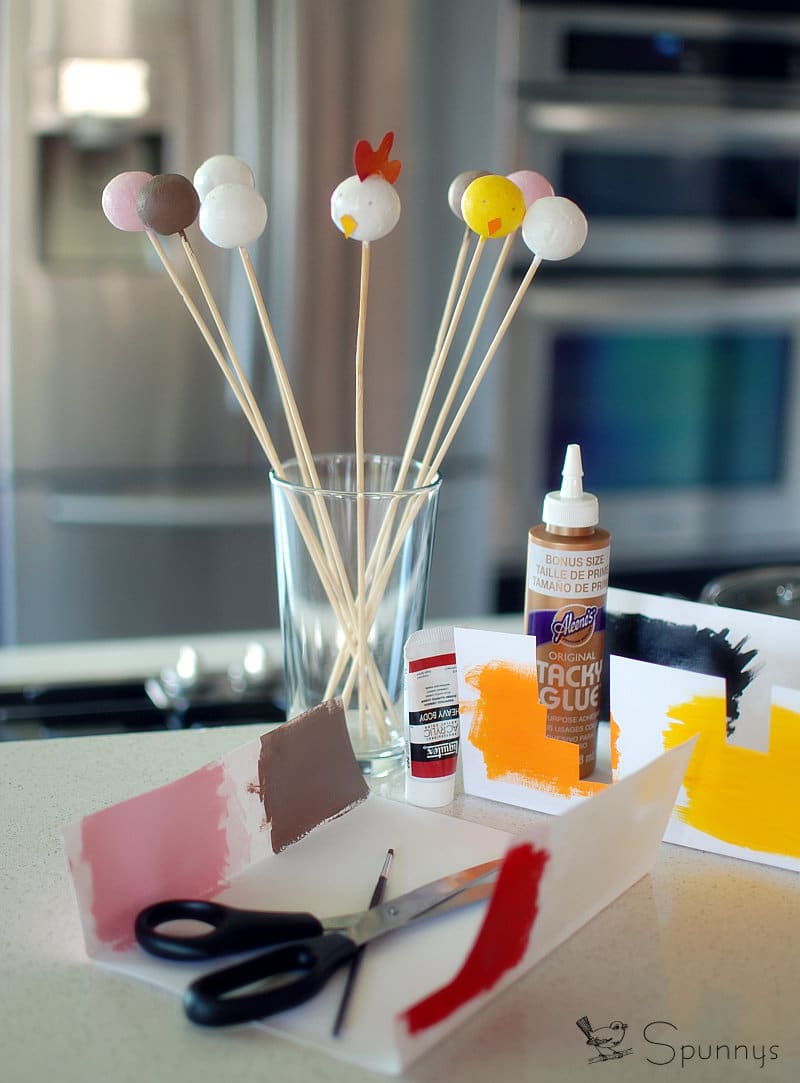
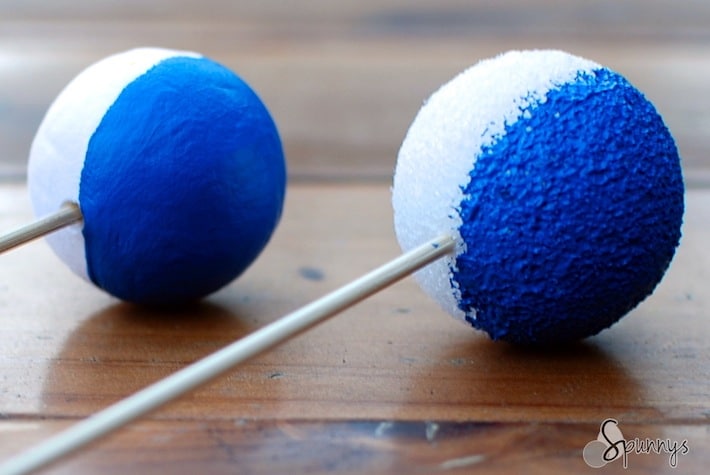
1. Paint the balls.

DIY miniature christmas ball ornaments drying

Balls drying up on bamboo sticks

Mount the spun cotton balls on wooden picks and paint them with solid colors. Spun cotton balls are made of paper and paint very easy.

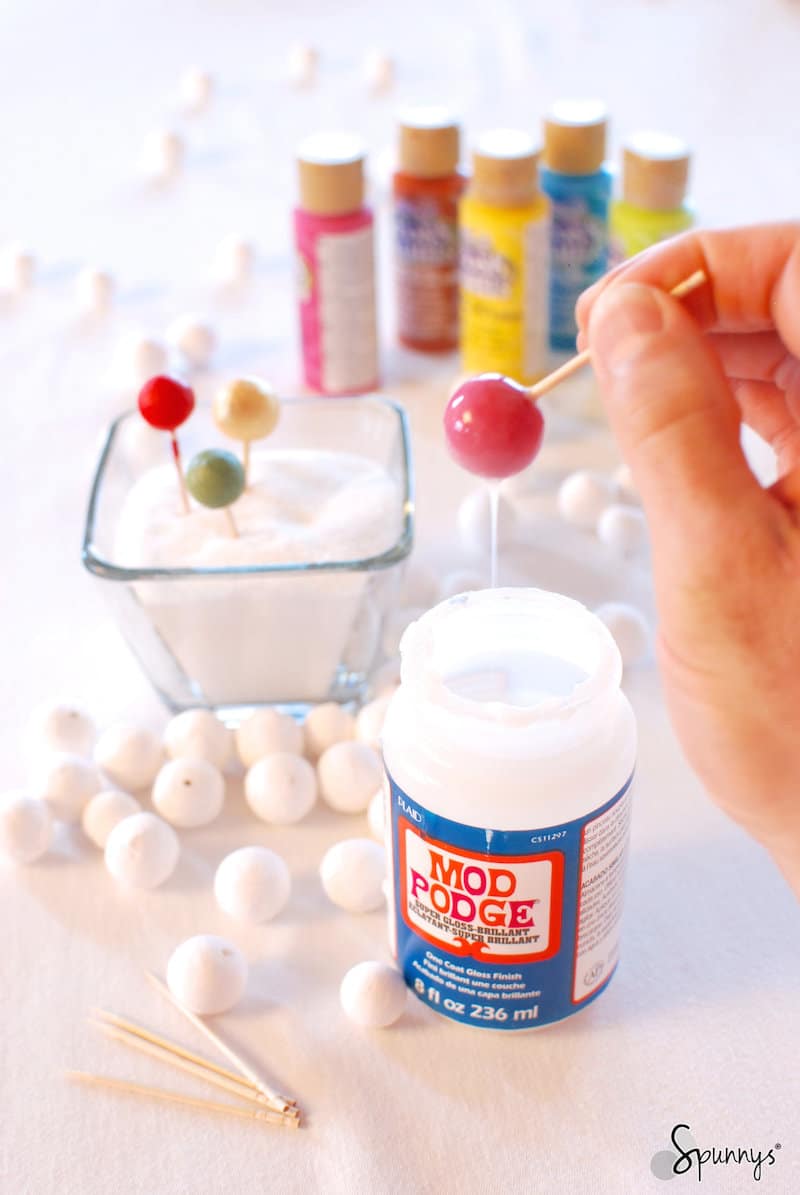
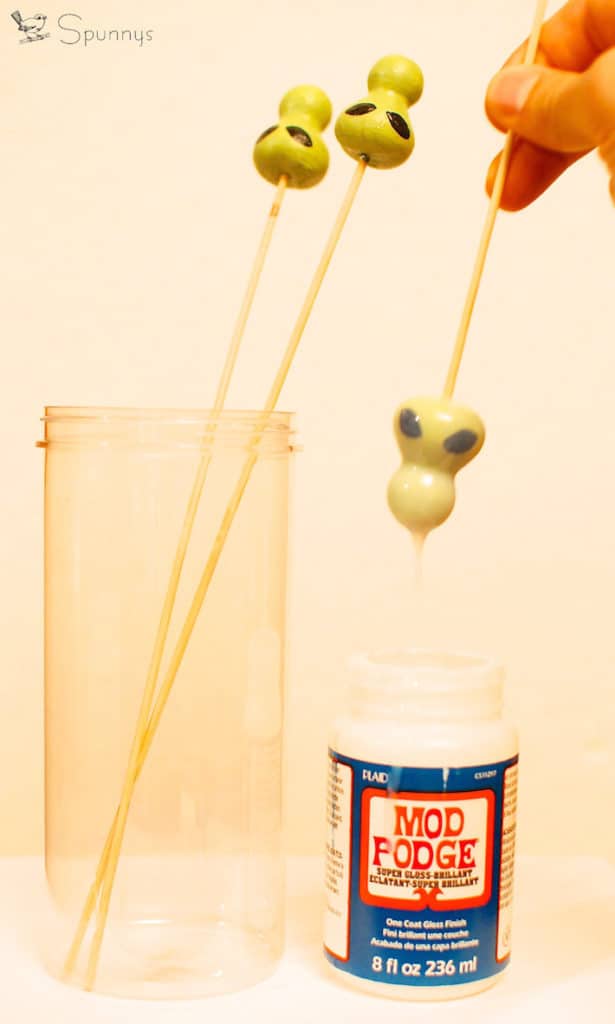
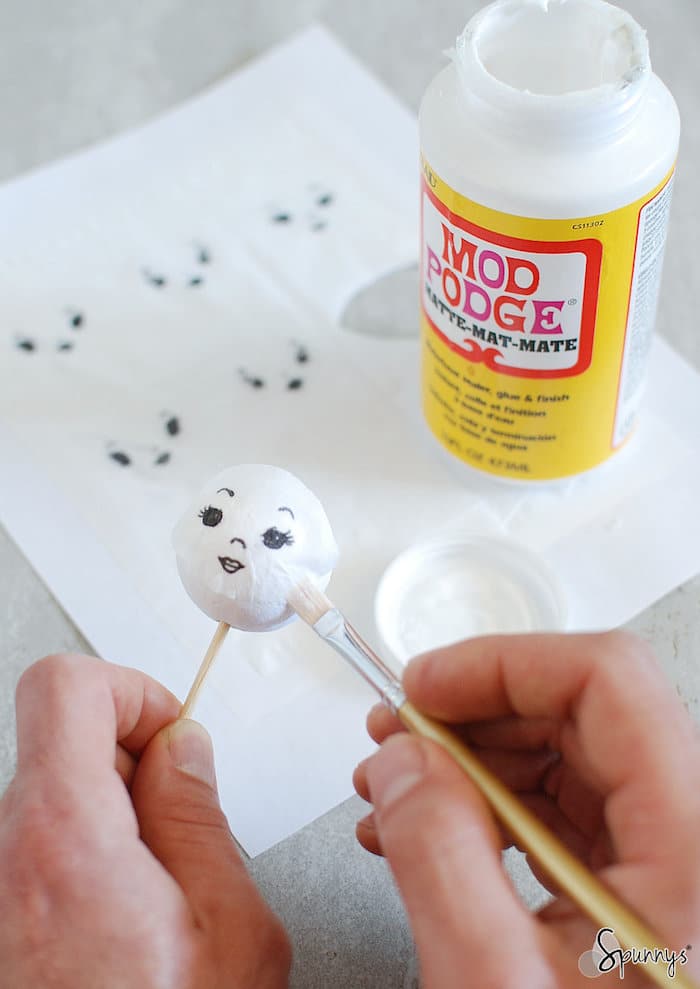
2. Add a gloss finish

For a shiny look, dip your mini Christmas ball ornaments in glossy mod podge and wait until it hardens.

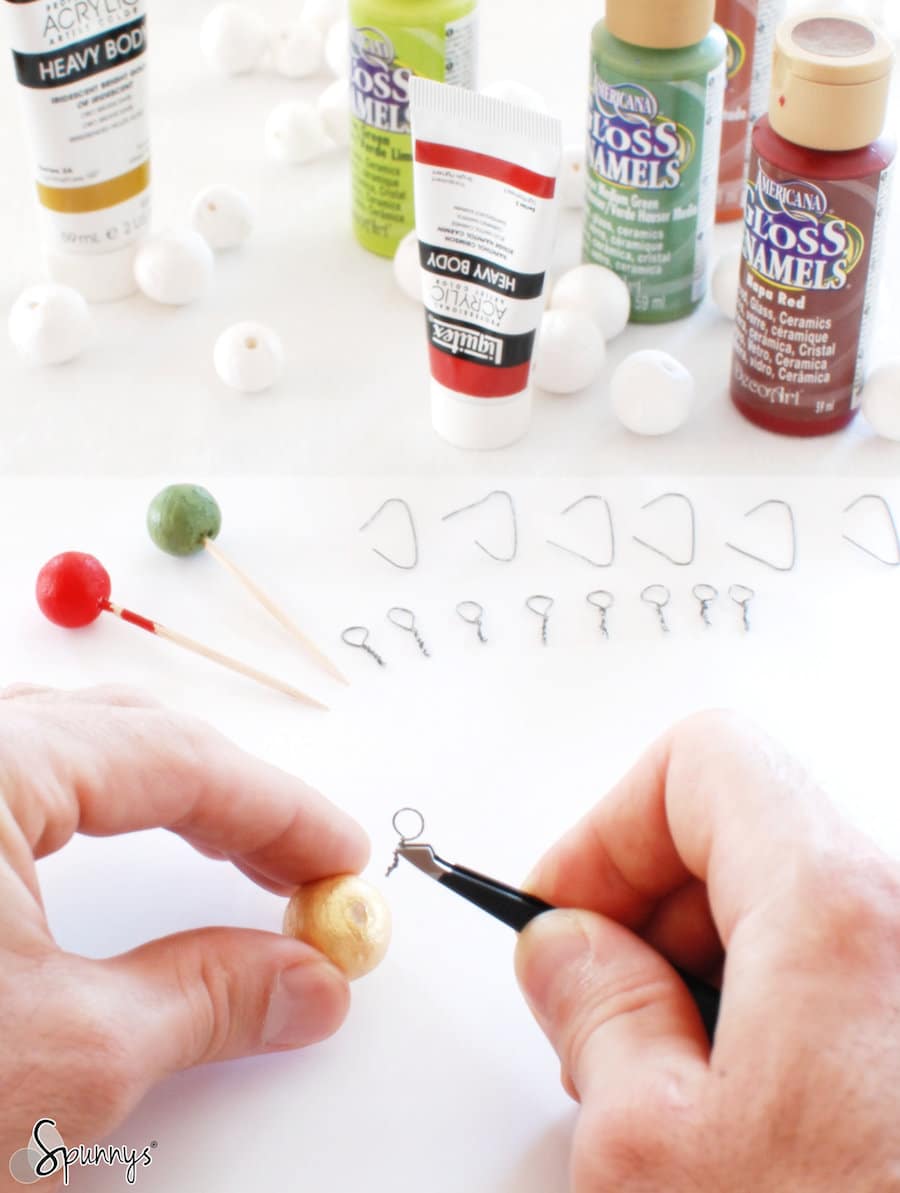
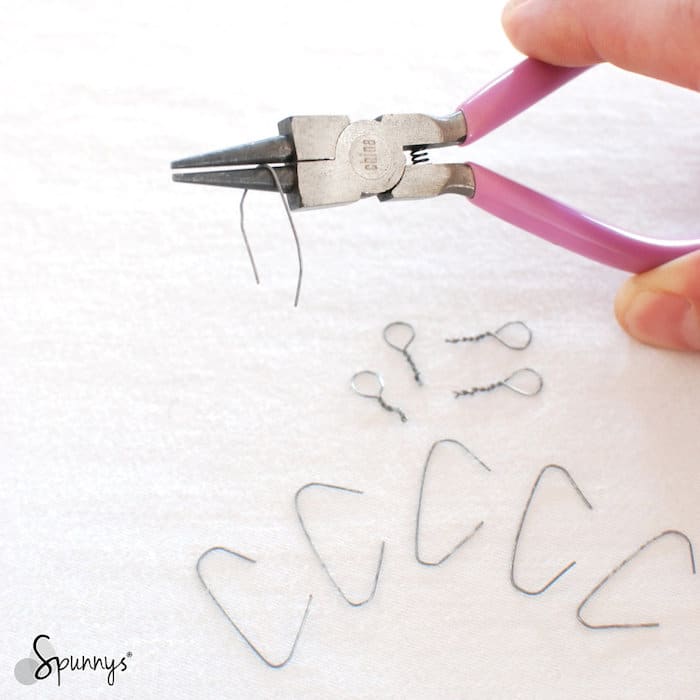
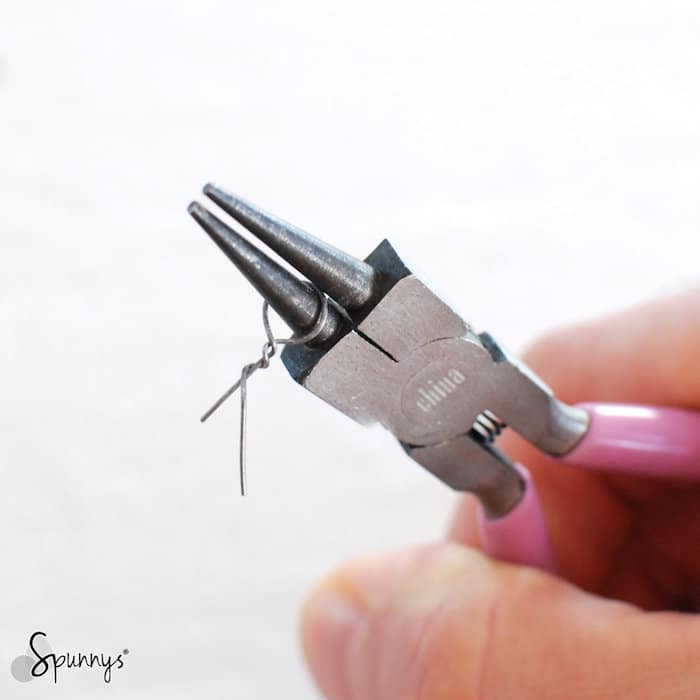
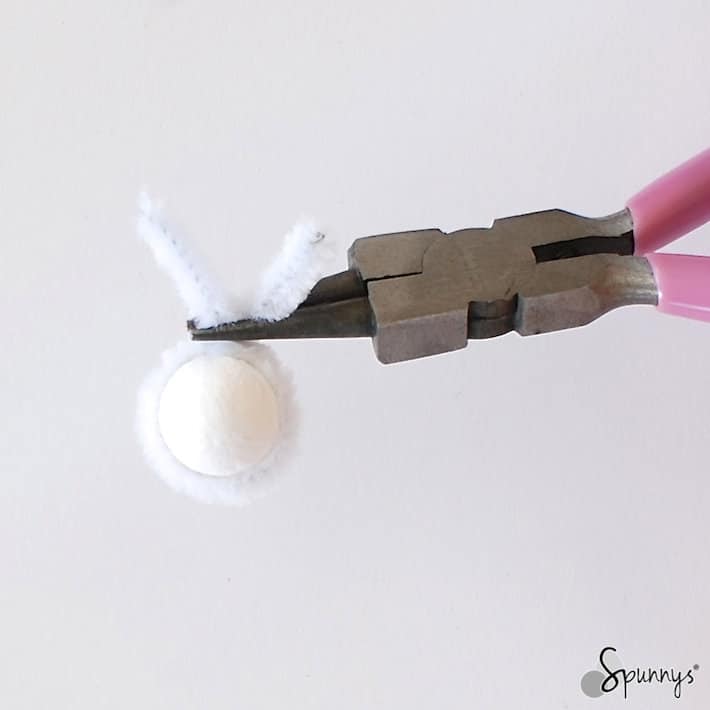
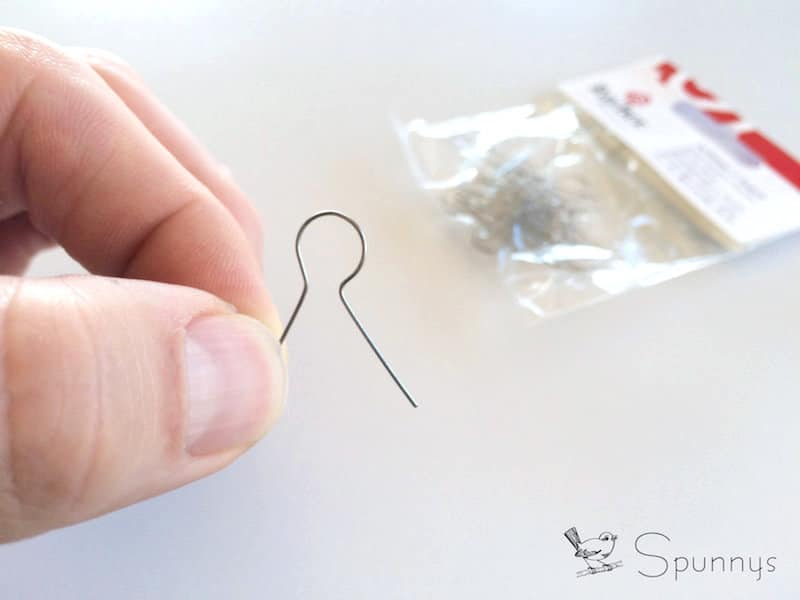
3. Prepare your hanging loops:

Loop short pieces of metal wire around your round nose pliers and twist the ends together. When done, cut off the excess wire with a wire cutter. If you do not have round nose pliers, you can loop wire around the handle of your painbrush to create the loop.

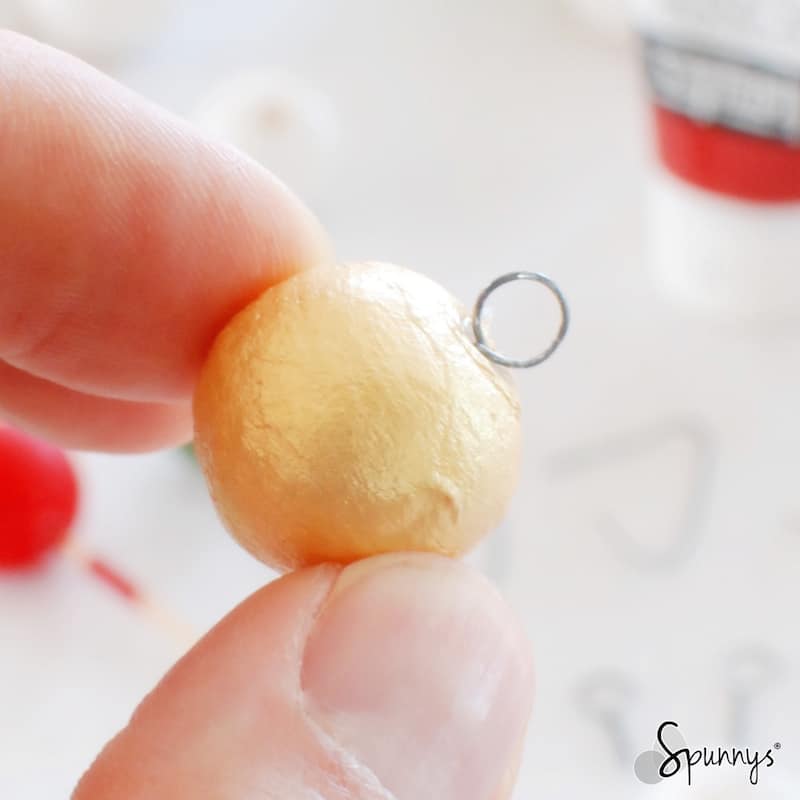
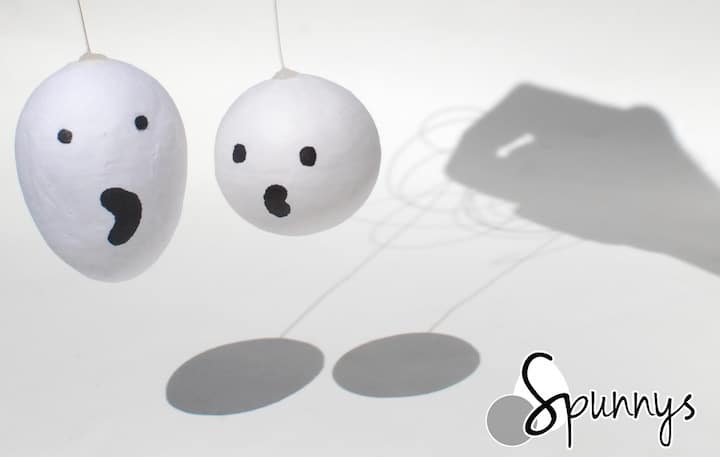
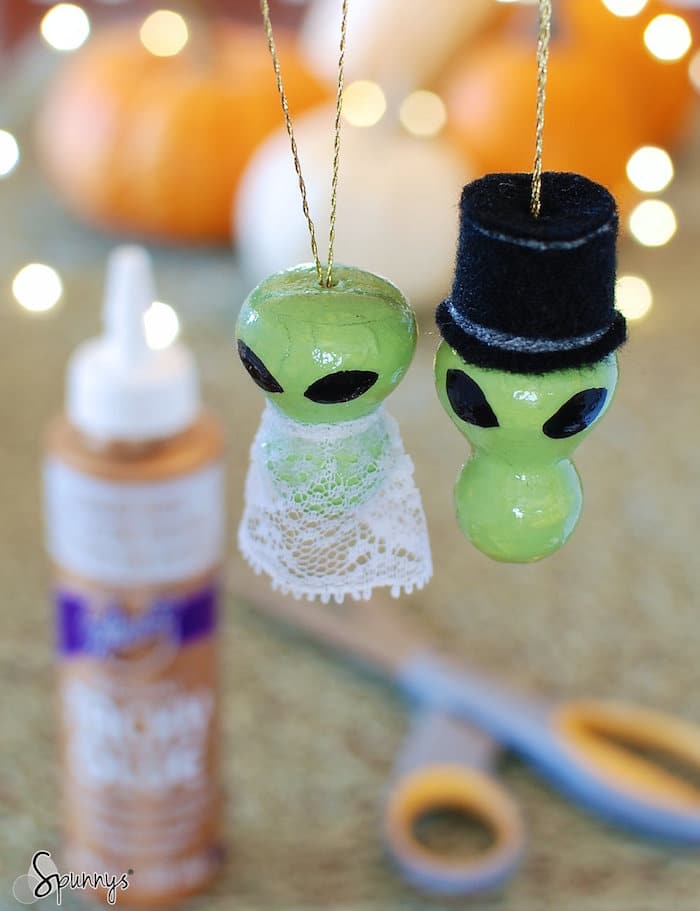
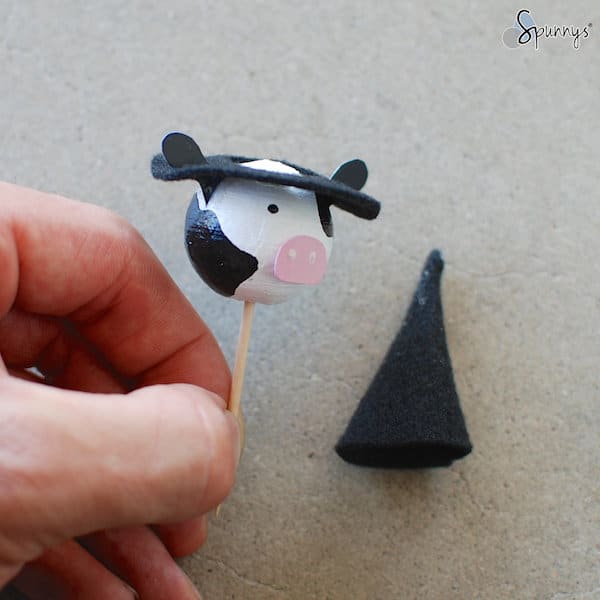
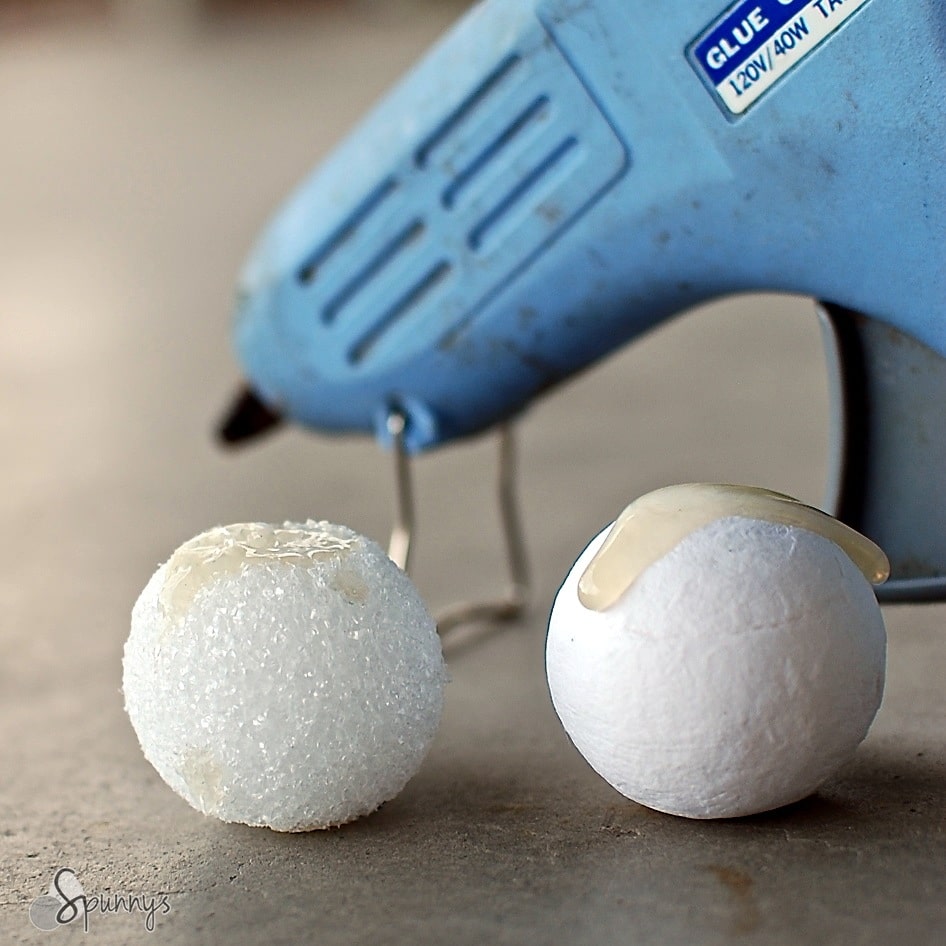
4. Glue the hanging loops to the balls.

You can use a glue gun or regular white craft glue. Both have pros and cons. With a glue gun, you will work a lot faster, but with regular glue, you won’t leave glue marks on top of the balls.

Pouring hot glue

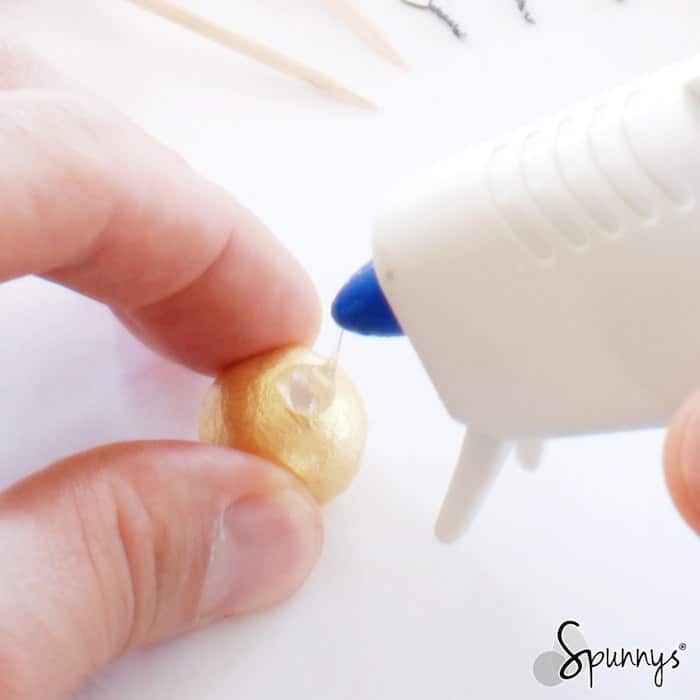
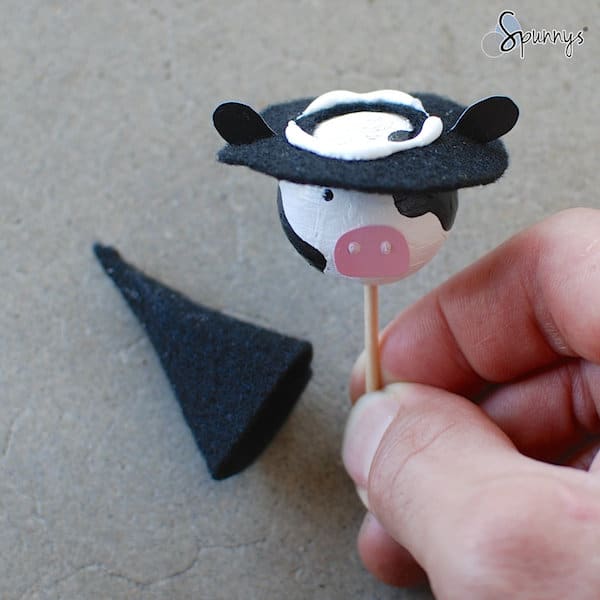
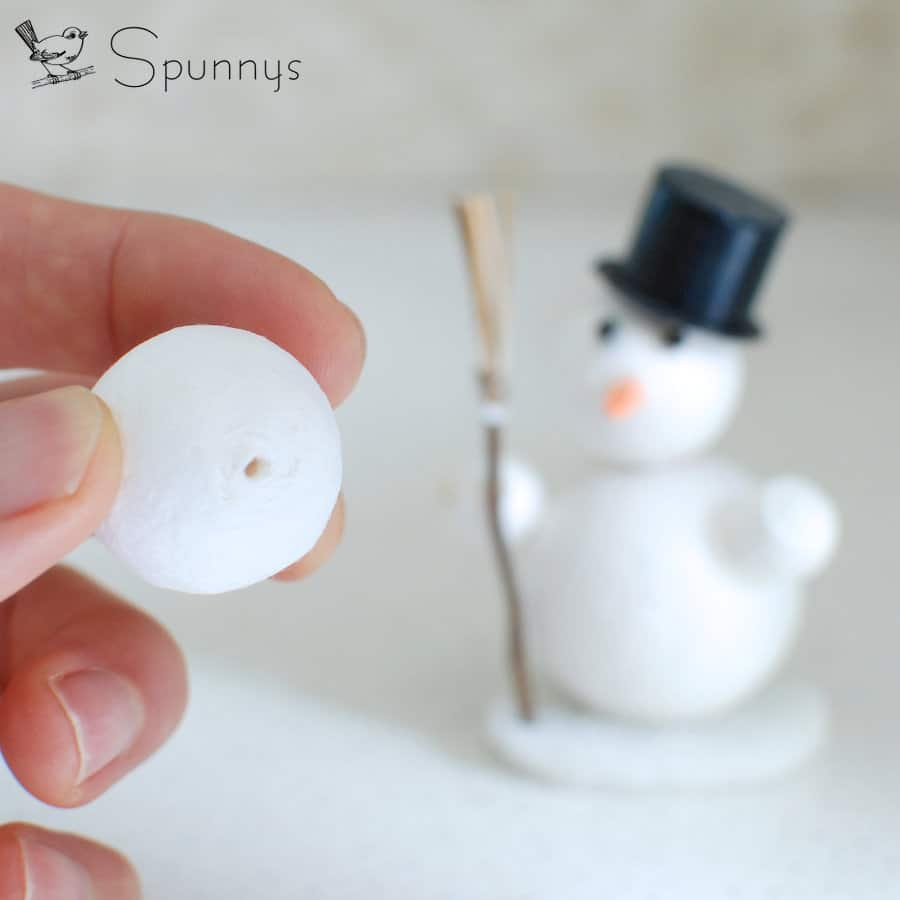
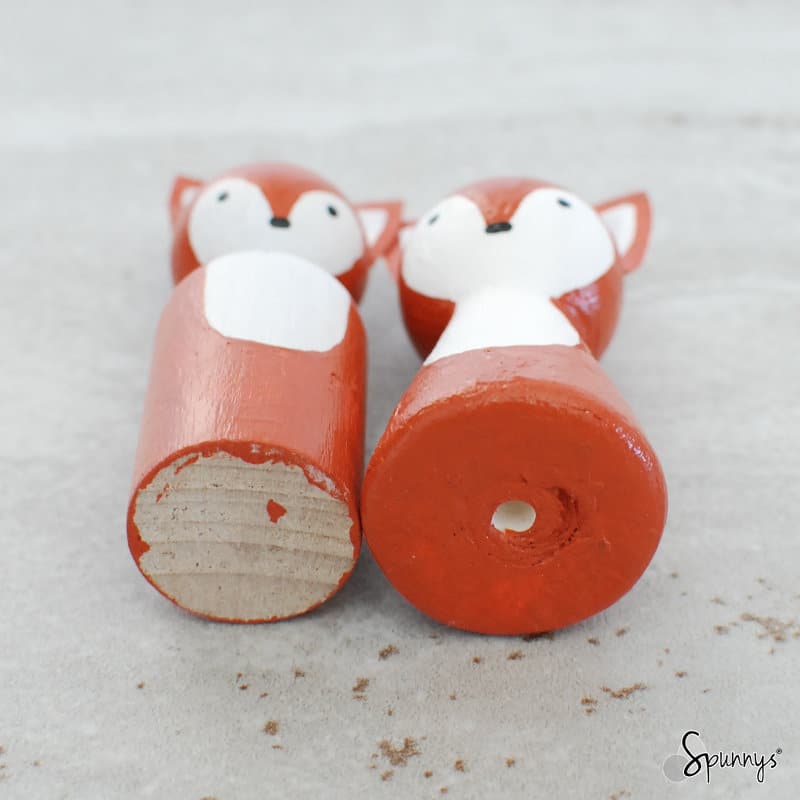
Pour a small amount of glue in the hole, and insert a metal loop right away. Note that all spun cotton balls have little holes.
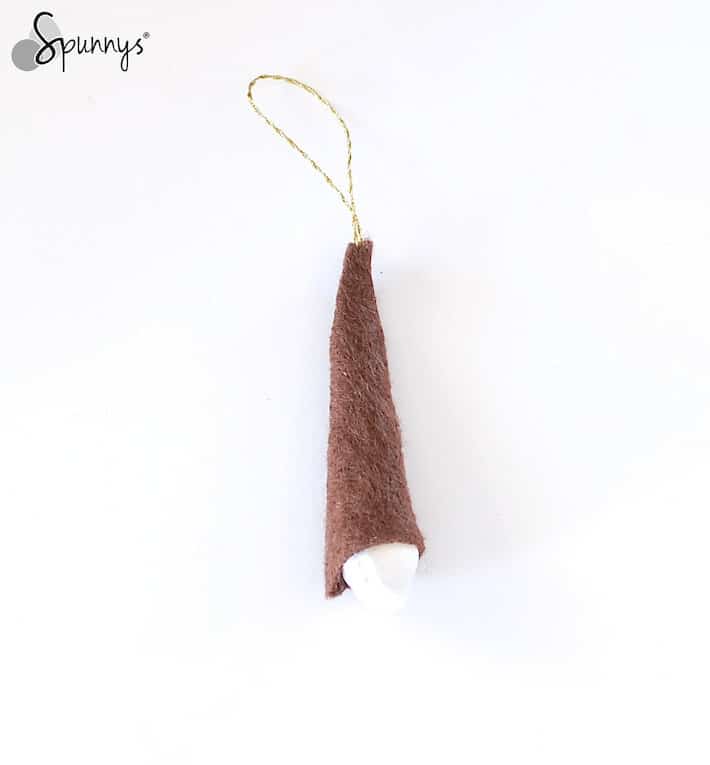
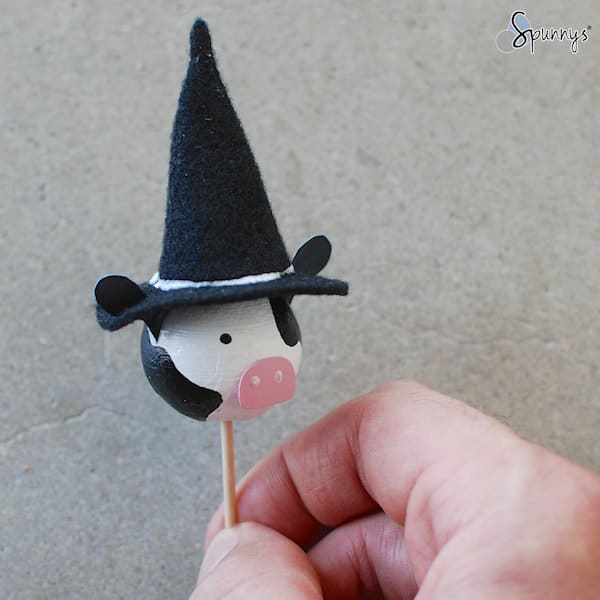
You are done :)

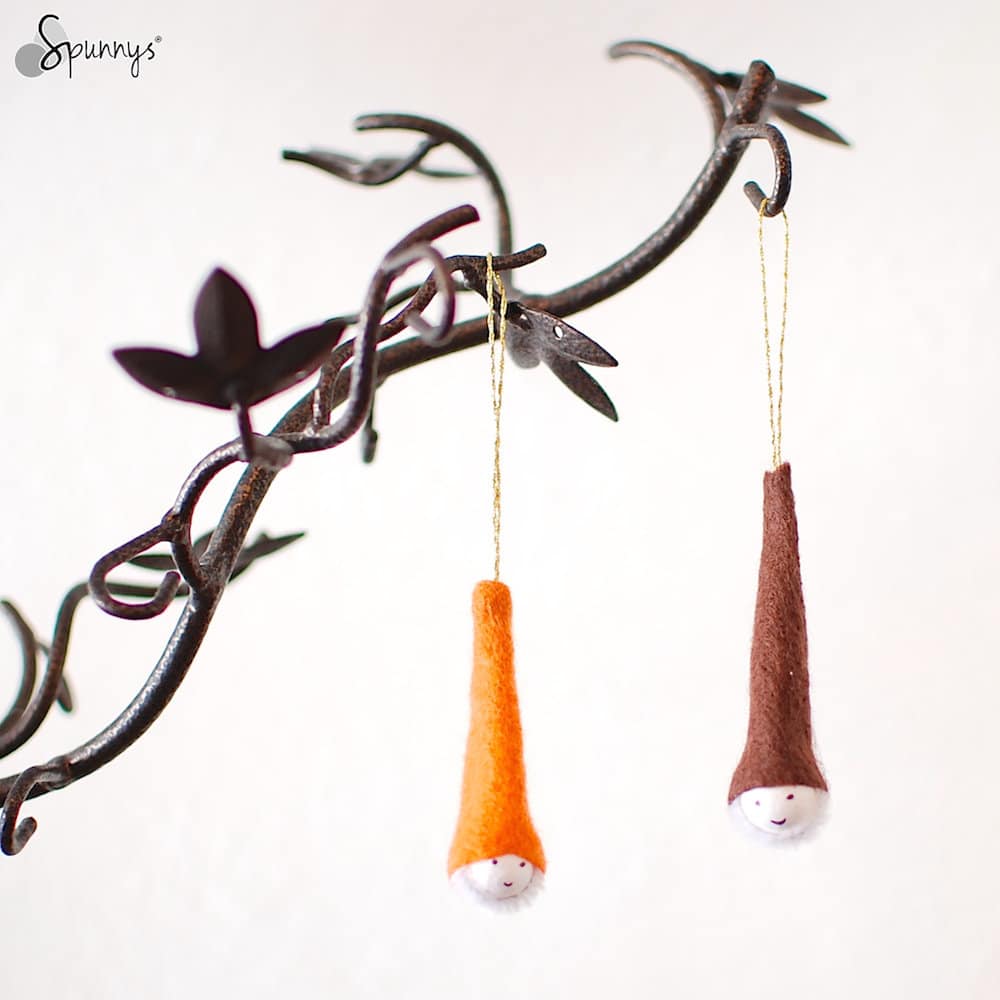
I hope you enjoyed this tutorial. Note that spun cotton balls come in plenty of sizes and that you could use the same technique to make regular size Christmas ball ornaments as well.

Happy Holidays to all of you!

Veröffentlicht am Schreibe einen Kommentar

How to make felt gnome and elf ornaments – DIY Tutorial

Felt gnome elft ornament DIY

Check out our tutorial and learn how to make adorable little felt gnome ornaments. You can use the ornaments to decorate your house for the Holidays or proudly display them anytime of the year.

Materials needed: 

To make one felt gnome ornament, you will need:

– A little piece of felt for the hat (about 3″x4″).
– A little piece of pipe cleaner for the beard and a full strand of pipe cleaner for the body.
– A small, 15mm spun cotton ball for the gnome’s head
– A little piece of string for the hanging loop.
– A pair of wire cutters and a pair of pliers.
– A pair of good scissors.
– Needle and thread (or a sewing machine if you have one).
– A black ball pen to draw the face.
– A small piece of cardboard to make the hat template.

Step by step directions: 

1. Prepare the felt hat

1. Start with the hat template. On a piece of cardboard, draw an 8″ diameter circle and cut out a pie wedge about 45º. When done, cut off the tip as in the picture below.

Felt gnome ornaments DIY tutorial instructions 1

2. Outline your template on a piece of felt and cut along the outline. You now have a felt cone.

3. Prepare a hanging loop: make a loop with a piece of string and tie a knot. Trim the excess.

4. Place the string loop onto the felt cone and make sure the knotted end sticks out from the top.

5. Fold your felt cone onto it self and sew the two edges together with very short stitches (important).

Felt gnome ornaments DIY tutorial instructions 2

6. Turn the hat inside out. You can use a pencil or a bamboo skewer to help. If you have done everything right, the knot is now in the hat.

Felt gnome ornaments DIY tutorial instructions 3

2. Work on the face and the beard

1. With a pair of scissors cut the bottom of the hat at a beveled angle. To find out where to cut, insert a ball in the hat. The point where the ball cannot be pushed down anymore is where the hat needs to be cut.

2. Wrap the ball with the piece of pipe cleaner. Twist the pipe cleaner a few times to lock the ball into place. When you are done, gather the two strands together.

3. Pour a generous amount of glue in the hat and insert the ball into the hat. Make sure the two strands of pipe cleaner make contact with the glue.

4. Draw the eyes and the mouth of the gnome with the ball pen. You could display the gnomes as is or continue with the next step and add a pipe cleaner body.

3. Add a pipe cleaner body.

To fashion the pipe cleaner body, you can check out our tutorial „how to make pipe cleaner animals„.

felt pipe cleaner gnome ornament house decor craft ideas

You are done :)

I hope you enjoyed this tutorial and I hope you are motivated to get started with your own felt gnome ornaments. Happy crafting and as always, if you have any questions, do not hesitate to get in touch.

Veröffentlicht am Schreibe einen Kommentar

How to make Halloween Ghost Ornaments – Spooky DIY Crafts

Cheesecloth ghost craft ideas Halloween ornaments

In this tutorial, learn how to make spooky little ghost ornaments that you can hang anywhere around the house for Halloween.

Ghost ornaments – Materials

  • Your choice of spun cotton balls or spun cotton eggs. I used 45 mm spun cotton balls for the pillowcases and crepe streamer ghosts and a 60mm tall spun cotton egg for the cheese cloth ghost ornament.
  • Depending on which ghost(s) you want to make, your choice of white fabric (old T-shirt, old pillow case), cheesecloth, or crepe streamer.
  • Black marker and pencil.
  • Mod podge or similar.
  • A few feet of fishing line.
  • A glue gun or some regular white craft glue.
  • A good pair of scissors.
  • A rubber band (for the cheesecloth ghost).
ghost craft ornaments materials

Step by step directions

The first 2 steps are the identical for the three projects.

  1. Insert one end of the fishing line in the spun cotton shape holes and pour hot glue. You could also use regular white craft glue but it would take much longer to dry.
  2. Draw a spooky ghost face onto the shapes with the black marker.
homemade ghost monster skull ornament tutorial DIY

Halloween Pillowcase Ghost Ornament

Pillowcase ghost ornament Halloween DIY craft ideas tutorial
  1. Make a tiny hole in the corner of an old pillowcase and thread the fishing line through until the pillowcase covers the ball.
  2. Cut the pillowcase to the desired length.
  3. Make two holes in the fabric for the eyes. To do so, mark the location of the eyes on the pillowcase with a pencil, remove the pillowcase completely and cut two little holes with a pair of scissors.
  4. Before putting the pillowcase back on the ball, brush a little mod podge over the ball, put the pillowcase back on and make sure the eyes are aligned with the holes. Let dry.
  5. Style the bottom of the the pillowcase by cutting off long triangle pieces.

Cheese Cloth Ghost Ornament

Cheesecloth ghost craft ideas Halloween ornaments
  1. Cut the cheesecloth into two 2 ft x 1 ft rectangles. Cover the ball with the cheesecloth pieces and wrap a rubber band around the ball to keep the cheesecloth in place. The fishing line goes through the middle of each piece of cheesecloth. Brush mod podge over the cheesecloth pieces. When dry, remove the rubber band.
  2. Style the bottom of  the cheesecloth by cutting off long triangle pieces.
  3. If the eyes don’t show through the cheesecloth (because they are covered with mod podge), you can re-draw them with the black marker over the cheesecloth

Crepe Streamer Ghost Ornament

crepe streamers ghost ornament Halloween craft ideas
  1. Cut 6 stripes of crepe paper, about 2 feet long. Make a tiny hole in the center of each of them for the fishing line to go through.
  2. Brush a little mod podge on the top half of the ghost’s head. Slide a stripe of crepe streamer down the line until it sits on the ghost head.  Brush a little mod podge over the piece of crepe streamer.  Repeat with the 5 other pieces.  Make sure each piece sits at a different angle.
  3. Re-draw the mouth and eyes with the black marker over the crepe streamer pieces.
  4. Style the bottom of the crepe streamers by cutting off long triangle pieces.

You are done :) I hope you enjoyed this tutorial and as always if you would like to share your ideas or ask questions, do not hesitate to use the comment section below. Happy crafting and Happy Halloween!

A few more Halloween Craft Ideas.

For these projects, we used blank spun cotton peg doll  shapes.

Veröffentlicht am Schreibe einen Kommentar

How to make Green Alien Ornaments – Halloween DIY crafts:

Halloween alien ornaments DIY

Check out our tutorial and learn how you can make spooky and slimy alien ornaments from spun cotton peg doll blanks.

List of materials:

– 40mm tall spun cotton peg dolls. Each peg doll will make one alien ornament.

Blank peg dolls

Peg dolls all have a little hole at the bottom

– Green and black acrylic paint.

– A few bamboo sticks.

– A jar of glossy mod podge for the slimy look.

– Your choice of string to make the hanging loop.

Project directions:

Step 1: Insert a skewer in each of your peg dolls and paint them all green. Rest the skewers in a container while the dolls dry.

Step 2: Use the black paint and paint the eyes of the alien ornaments. Let dry. Make sure the ornaments don’t touch each other while they dry.

Step 3: keep your alien ornaments on their sticks and dunk them in the jar of glossy mod podge. Then find a place where you can rest the sticks in a perfectly vertical position while the mod podge dries. You can tape them to the edge of a counter for example (see picture below).

Step 4: Gently pull the sticks out of the alien ornaments by twisting and pulling.

Step 5: Tie a loop with a piece of string. Double the knot to enlarge it.

Step 6: insert the knot in the peg doll’s hole and push down with a bamboo skewer. Pour a little glue to secure the knot in the alien ornament. Let dry.

YOU ARE DONE :)

I hope you enjoyed this tutorial. You can also decorate your alien ornaments a little if you would like. Happy Crafting to all of you!

DIY Halloween decor aliens ornaments area 51

It’s wedding night at Area 51

Veröffentlicht am Schreibe einen Kommentar

How to make farm animal toppers with Witch Hats – DIY Halloween Crafts

Halloween cupcake toppers DIY project idea

Check out our tutorial and learn how to make these cute little farm animal cupcake toppers all dressed up with spooky witch hats.

1. Make the farm animal toppers.

All the steps and materials to make the toppers are detailed in our previous tutorial: how to make farm animal cupcake toppers.

2. Make the witch hats.

You will only need a few materials:

  • black felt
  • a pair of scissors
  • a tube of white tacky glue.
  • binder clips.

Step 1: Start with the top part of the hat (the cone). Cut out a „quarter pie“ shape in a piece of felt. It doesn’t have to be perfect as witch hats are never perfect anyway.

Halloween cupcake toppers homemade

Step 2: Pour a bead of glue along the edge of your cutout.

How to make halloween cupcake toppers

Step 3: Roll your quarter pie shape into a cone. Use two binder clips to hold the seam shut for 5-10 minutes (until the glue is dry).

Halloween cupcake toppers DIY

Step 4: In a different piece of felt, cut out a doughnut shape. The center hole of the doughnut needs to be slightly smaller than the base of the cone. Then cut out 2 holes in your doughnut to accommodate the ears.

halloween cake toppers

Step 5: Position the felt doughnut on your farm animal topper head.

halloween cupcake toppers tutorial

Step 6: Pour a bead of glue around the inner rim of the doughnut.

cow cupcake topper

Step 7: Gently cover the doughnut with the cone. Let the glue dry until it becomes transparent.

halloween cupcake toppers ideas

YOU ARE DONE!

I hope you enjoyed this tutorial and that you found some inspiration. As always, do not hesitate to ask your questions in the comment section below. Happy crafting and Happy Halloween!

Veröffentlicht am Schreibe einen Kommentar

How to make a lightweight paper bead necklace – Jewelry Craft DIY

paper bead necklace DIY

Check out our tutorial and learn how you can make a lightweight and comfortable paper bead necklace from ø 15 mm spun cotton balls.

Paper Bead Necklace – project materials

– ø 15 mm Spun cotton balls.

– Strong black thread and a needle.

– Acrylic Paint and a paint brush.

– Two pairs of pliers.

– A clasp mechanism such as the one pictured below:

clasp mechanism

Step by step tutorial

Step 1: Paint all the beads.

The beads are easier to paint if you mount them on sticks, toothpicks and bamboo skewers work great.

Step 2: Prepare your necklace line.

Make the line at least 6 inches longer than the desired length of your necklace because the knots will shorten the line and also because you need enough thread at the end to tie your last knot comfortably.

Double our quadruple your line to make it stronger.

Your line should look like the one in the picture below. Notice there are two knots on one side.

necklace craft tutorial

Cut off the excess thread.

Step 3: Thread the first bead.

Insert the needle into the pre-existing hole, and exit on the other side. Slide the ball until it covers knot #2 and tie a third knot just next to it.

Step 4: Thread the other beads.

For tall the other beads, insert the needle from the opposite end and exit from the pre-existing hole (like in the picture below). After each bead, tie a new knot to secure them into place.

paper bead necklace DIY

Step 5: The last bead.

When you thread your last bead, you should be left with at least 3 to 4 “ of line. At this point, cut the end of the loop to free up your needle and create a new loop by tying a new knot just next to the last bead. Trim the excess thread.

Step 6: Attach the clasp.

With two pairs of pliers, one in each hand, open the clasp rings and attach them to the thread loops. Close up the clasp rings.

YOU ARE DONE :)

paper bead necklace designs

I hope you enjoyed this tutorial and as always, do not hesitate to comment below if you have any questions. For more DIY necklace projects, you can also check out our other tutorial : how to make a fabric covered bead necklace.

Veröffentlicht am Schreibe einen Kommentar

How to make Farm Animal Cupcake Toppers

farm animal cupcake toppers DIY cake pops

Follow our simple tutorial and learn how you can make these farm animal cupcake toppers from ø 30mm spun cotton balls.

Farm Animal Cupcake Toppers – Materials

– ø 30 mm Spun cotton balls

– Paint. Any paint that works on paper will also work on spun cotton balls. We used regular acrylic paint.

– White card stock paper

– Brushes, toothpicks (or bamboo skewers), tacky glue, a pencil, and a cotton ball for the sheep’s hair doe.

Step by step tutorial directions

1- Begin with painting the balls with solid colors. It’s easier to paint them on a stick. It also makes resting them while they dry very convenient.

how to make farm animal toppers

2- Paint your card stock paper on both sides. Once dry, cut out the ears, snouts, beaks and rooster comb.

3- Glue the ears, snouts, beaks and rooster comb to their respective animal heads.

4- Once the glue is dry, pencil the location of the eyes and dab with black paint (we used a wood skewer dipped in black paint).

5- Add the last details: paint the sheep snout and give him a little cotton hair doe, paint the ears an nostrils.

You are done :)

homemade farm animal cupcake toppers
farm animal cake toppers craft ideas

We hope you have fun and as usual don’t hesitate to send us your questions. Happy crafting!

Veröffentlicht am Schreibe einen Kommentar

How to make a Spun Cotton Easter Bunny Figurine – DIY Easter Crafts

spun cotton easter bunny figurine DIY

Check out our detailed, step by step tutorial and learn how you can make a Spun Cotton Easter Bunny figurine from spun cotton shapes.

Spun Cotton Easter Bunny Figurine – DIY Project Materials:

  • One 45mm (1 – 3/4 inches) Spun Cotton Ball for the body.
  • Two 15mm (19/32 inch) Spun Cotton Balls for the two paws.
  • One 36mm Spun Cotton Egg for the head. You could also use a 38mm egg, a 40mm egg, or even a 30mm ball. Each style egg has a different style (more pointy, or more round)
  • Craft acrylic paint (grey, red, and white).
  • Paint brushes: one large one, one thin one.
  • A glue gun or white tacky glue.
  • A small piece of paper, about 2″ x 5″, for the ears.
  • A thin black marker to draw the eyes and the mouth.
  • A pencil to outline.
  • A good pair of scissors.
Easter bunny crafts materials

Optional materials:

  • A little piece of cardboard to build a pedestal for the bunny so it can stand on its own. I used cardboard from the flap of a shipping box. A drink coaster or a cereal box would work too.
  • A few bamboo skewers. They are handy to paint the shapes and let them dry.
Spun cotton balls bamboo skewers

Step by Step Directions:

STEP 1: body painting

With the gray paint, paint the large ball, the egg, and a small 2-inch long portion of the piece of paper (on the two sides). Rest everything in a cup or a jar to let the paint dry.

With the white paint, paint the top of the little piece of cardboard.

Spun cotton balls painting

STEP 2: Outline the facial features, the ears, and the pedestal

When the paint is dry, use a pencil or a thin black marker to:

– Outline the ears on the piece of paper. Draw them about 2 inches long and 3/4 inch wide (at the widest point).

– Outline the face of the bunny on the spun cotton egg: the eyes, the nose, and the mouth.

– Draw a circle on the piece of cardboard. You can use a glass or a cup as a guide.

Easter bunny crafts for kids

STEP 3: Precision painting

Mix red and white paint to make pink and paint the nose and the inside part of the ears. Let dry.

Easter bunny arts and crafts

STEP 4: Cut out the different elements

With a good pair of scissors, cut out the pedestal in the cardboard and cut out the ears in the paper

Easter bunny crafts scissor cutouts

STEP 5: Glue all the pieces together.

I use a healthy amount of glue to make sure the figurine is sturdy. The glue marks can then be hidden by painting over them.

Easter bunny crafts glue gun

To give your figurine a little bit of character, bend the ears slightly forward. 

Rabbit peg doll side view

Congratulations you are done :) I hope you enjoyed this craft and I hope it inspired you. You can also experiment with different colors and different shape combinations. For example in the picture below, I used 30mm spun cotton balls for the bunny heads.

easter bunny figurines craft ideas

As usual, do not hesitate to send us your questions. Happy Crafting!

Veröffentlicht am Schreibe einen Kommentar

How to make Christmas ball ornaments from spun cotton balls – DIY Holiday Crafts

homemade painted christmas ornaments

Check out our tutorial and learn how you can make your own hanging Christmas ball ornaments from spun cotton balls.

DIY Christmas Ball Ornaments – project materials:

  • ø 45 mm Spun cotton balls (or larger). Spun cotton balls are lightweight and shatterproof.
  • Acrylic Paint and brushes.
  • Decorative string or ribbon.
  • Glue gun and white tacky glue
  • Scissors
  • Optional and to your liking: glitter, gem, sequin, trims, Dresden …
blank christmas balls
ø 45 mm spun cotton balls

Step by step directions

Start with the paint

Paint the spun cotton balls with one solid color. They will be dry to the touch in less than 20 minutes.

Continue with some glitter

Glue some glitter on. The best way to glue glitter is to brush a little bit of white tacky glue on your ornament, sprinkle the glitter on, and tap the ornament to loosen off the excess glitter. The tacky glue will dry to a clear finish and the glitter will be solidly attached.

Add more decorations

With tacky glue, you can glue on ribbons, trimming, Dresden, Sequins, decorative gems, and more. You can also use a glue gun to work faster but the finish won’t be as nice because the glue gun will leave glue marks.

Add a hanging loop to your ornaments.

There are several technique that you could use here.

  1. Make a hanging loop out of decorative string or ribbon, and wrap the string all around the ornament.
  2. Make a hanging loop out of small gauge metal wire (picture on the left) or buy one already made (picture on the right). Pour a little glue in the spun cotton ball hole and insert the metal hanging loop.

You are done :) I hope that you enjoyed this tutorial and as usual, if you have any questions, do not hesitate to leave a comment. Happy Crafting!

Veröffentlicht am Schreibe einen Kommentar

How to make a Snowman Figurine from spun cotton balls – Winter Crafts DIY

DIY spun cotton snowman ornament

Check out our step by step tutorial and learn how you can make a snowman figurine with a few spun cotton balls.

DIY snowman figurine – materials

  • One 45mm diameter spun cotton ball for the body
  • One 30mm diameter ball for the head
  • Two 15mm diameter balls for the hands.
  • A glue gun or white tacky glue.
  • A pair of scissors.
  • Two black peppercorns for the eyes.
  • Orange foam pad for the nose (or a piece of cardboard painted orange).
  • A piece of cardboard to make a pedestal
  • A wood twig and a few pine needles to make the broom.
  • Optional : card stock paper and black paint to make the hat.
Snowman ornament DIY craft idea
ø 30 mm spun cotton ball

Step by step directions

1/ Glue the head and the two hands onto the body. If you would like to hang the snowman figurine as an ornament instead of displaying it on a pedestal, make sure to have the little hole in the head pointing up. You can then insert and glue a hanging loop in this hole.

Spun cotton ball ornament hook
You can buy hanging loops or make your own

2/ Glue the peppercorns onto the snowman’s face.

3/ Cut out the nose in the piece of foam pad and glue onto the snowman figurine.

4/ Glue your snowman onto its pedestal base so it can stand up on its own.

5/ Use the glue gun to make the miniature broom by gluing together the twig and the pine needles. Glue to the snowman’s hand.

Christmas figurines DIY craft idea

You are done :)

You can use the same technique to create other Christmas figurines, here are a few project ideas that you can use for inspiration.

I hope you enjoyed this simple snowman figurine tutorial. Happy crafting and as always, do not hesitate to get in touch if you have any questions!

Veröffentlicht am 2 Kommentare

Wooden Peg Dolls vs Spun Paper Peg Dolls: Craft Comparison

How to paint peg dolls tips

Peg dolls are a timeless craft shape used in DIY decorating, miniature figures, and imaginative projects.

This guide compares wooden peg dolls with spun paper peg dolls to help you decide which one suits your project style and technique best.

wooden peg doll cute fox
Paper peg doll fox (left) vs Wooden peg doll fox (right)

What Are Wooden Peg Dolls and Spun Paper Peg Dolls?

Wooden peg dolls are simple lathe-turned wooden figures that can be painted, decorated, or used in play. They have a solid surface and classic look that many crafters appreciate.

Spun paper peg dolls are made from soft, tissue-like paper spun tightly into a shape. They accept paint and decorations differently from wood because of their paper surface.


Sturdiness and Durability

Wooden peg dolls are generally more rigid and durable because of their solid wooden construction. This can make them ideal for projects where strength and handling are priorities.

Spun paper peg dolls are surprisingly sturdy for paper figures, but wood tends to hold up better under frequent handling.


Painting and Decorating Ease

Painting

Many crafters find spun paper peg dolls easier to paint because the paper surface can take acrylics quickly and dries fast. The paper shape may also be easier to hold with a skewer or stick while painting, making it convenient for detailed color work.

Wooden peg dolls are also paint-friendly, but paint may take slightly longer to dry on wood, and some techniques like holding the doll during painting require a careful grip.

wooden peg doll paper peg doll

Adding Details

Both shapes can be decorated with accessories like felt clothing, pipe cleaners, and other embellishments. Spun paper peg dolls may allow small details (like miniature ears or accessories) to be lightly inserted into the surface, while wood may require adhesive alone.


peg doll fox woodland animals

Transferring or Applying Images

Spun paper surfaces can be well suited for techniques like tissue image transfers, which adhere smoothly to the paper and allow for detailed features like facial images.

How to transfer prints on spun cotton

On wooden peg dolls, transferring images often involves more challenging techniques (e.g., wax paper transfer) because wood doesn’t absorb or bond imagery the same way paper does.


Which Peg Doll Should You Use?

Choose wooden peg dolls if:

  • You prefer a traditional toy-like feel.
  • Durability and solid construction are key.
  • You want a classic surface for acrylic paint.

Choose spun paper peg dolls if:

  • You want a smooth surface ideal for quick brush painting.
  • You plan detailed decoration or image transfers.
  • You like lightweight shapes that are comfortable to hold during craft work.

Both types of peg dolls are valid and fun craft tools; your choice depends on your project needs and creative style.


Final Thoughts

Wooden peg dolls and spun paper peg dolls each bring creative versatility to crafts. By understanding the difference in surface, handling, and decoration techniques, you can match the right peg doll to your project — whether that’s a simple painted figure, a decorated ornament, or a miniature collectible.


FAQ

What is a spun paper peg doll?

A spun paper peg doll is a craft figure made from soft tissue-like paper spun into a mold.

Are spun paper peg dolls easy to paint?

Yes — spun paper peg dolls have a surface that accepts acrylic paint well and dries quickly, making them a popular choice for detailed craft decorating.

Which peg dolls are better for adding tiny accessories?

Spun paper peg dolls can sometimes allow accessories to be inserted into the surface more easily than wood, but both types can be decorated creatively.


SaveSave

Veröffentlicht am 14 Kommentare

Spun Paper Balls vs Foam Craft Balls: A Craft Comparison

craft foam balls vs spun paper balls


What Are Spun Paper Balls and Foam Craft Balls?

Spun paper balls are lightweight craft shapes made from soft paper (similar to tissue paper) that is spun into a mold to form a smooth, paintable shape. They’ve long been commonly called spun cotton balls, but the material is paper.

Foam craft balls are solid spheres made from lightweight polystyrene foam with a porous surface.

Both are popular for DIY crafts, decorating, and school projects—your best choice depends on the finish and technique you want.


Texture and Appearance

Spun paper balls have a smoother paper-like surface that accepts paint and markers easily.

Foam craft balls have a porous texture with small air pockets that create a bumpy finish.

While foam balls are usually perfectly round, spun paper balls may have slight variations depending on size and production.


cut a foam ball in half

Painting Craft Balls

Spray Painting

how to paint foam balls polystyrene

Both spun paper balls and foam craft balls can be spray painted.

craft foam balls glitter spray paint

Foam balls often show even coverage quickly due to their porous surface.
Spun paper balls dry faster and absorb less paint because of their paper structure.

Brush Painting

Spun paper balls are easier to paint with brushes and acrylic paints. The smooth paper surface allows for clean strokes and faster drying.

craft foam balls paint acrylic

Foam balls may require more paint because the texture absorbs paint into small cavities.


Craft foam balls paint watercolor

Drawing and Writing on Craft Balls

Spun paper balls can be drawn on with pencils, markers, and pens just like paper.

foam ball spun cotton polar bear arctic animal

Foam craft balls are more difficult to draw on because of their uneven surface.

For detailed designs or lettering, spun paper balls are usually easier to work with.


Gluing and Craft Assembly

Both materials hold glue well.

Foam balls work best with low-temperature hot glue to avoid melting.

foam balls glue gun

Spun paper balls bond easily with craft glue, tacky glue, and hot glue.


Water Resistance and Durability

Foam craft balls are water resistant and can be used in outdoor decorations.

Spun paper balls should not be soaked in water, as they are made from paper fibers and may lose shape if wet.


Choosing the Right Craft Ball for Your Project

Choose foam craft balls if your project needs water resistance or a firm structure.

Choose spun paper balls if your project involves painting, drawing, or detailed decorating.

Both materials are useful depending on the creative goal.


Final Thoughts

Spun paper balls and foam craft balls each offer unique benefits for crafting.

Understanding the surface, painting behavior, and durability of each craft shape helps you choose the best material for your DIY projects.


Frequently Asked Questions About Craft Balls

Are spun paper balls the same as spun cotton balls?
Spun paper balls were traditionally called spun cotton balls, but they are made from paper fibers rather than cotton.

Can you paint spun paper balls?
Yes, spun paper balls work very well with acrylic paint, spray paint, and craft paint.

Are foam craft balls waterproof?
Foam craft balls are water resistant and suitable for outdoor use.

Which craft balls are better for drawing?
Spun paper balls are easier to draw on because their surface is smooth like paper.

Can you glue decorations to both types?
Yes, both spun paper balls and foam craft balls work with common craft glues.

SaveSave