
Check out our tutorial and learn how you can easily make beautiful mushroom necklace pendants from Spun Cotton Mushroom blanks.


Project materials:
– Small size Blank spun cotton mushrooms.
– Your choice of acrylic paint colors (any paint that works on paper will also work on spun cotton).
– A high gloss varnish.
– A few jewelry eye pins.
– A jewelry plier set (flat nose, round nose and side cutters). You could get away with just a pair of wire cutters.
– A few toothpicks or bamboo skewers.
– A safety pin.
Step by Step Directions:
Below is a detailed pictorial followed by written instructions.
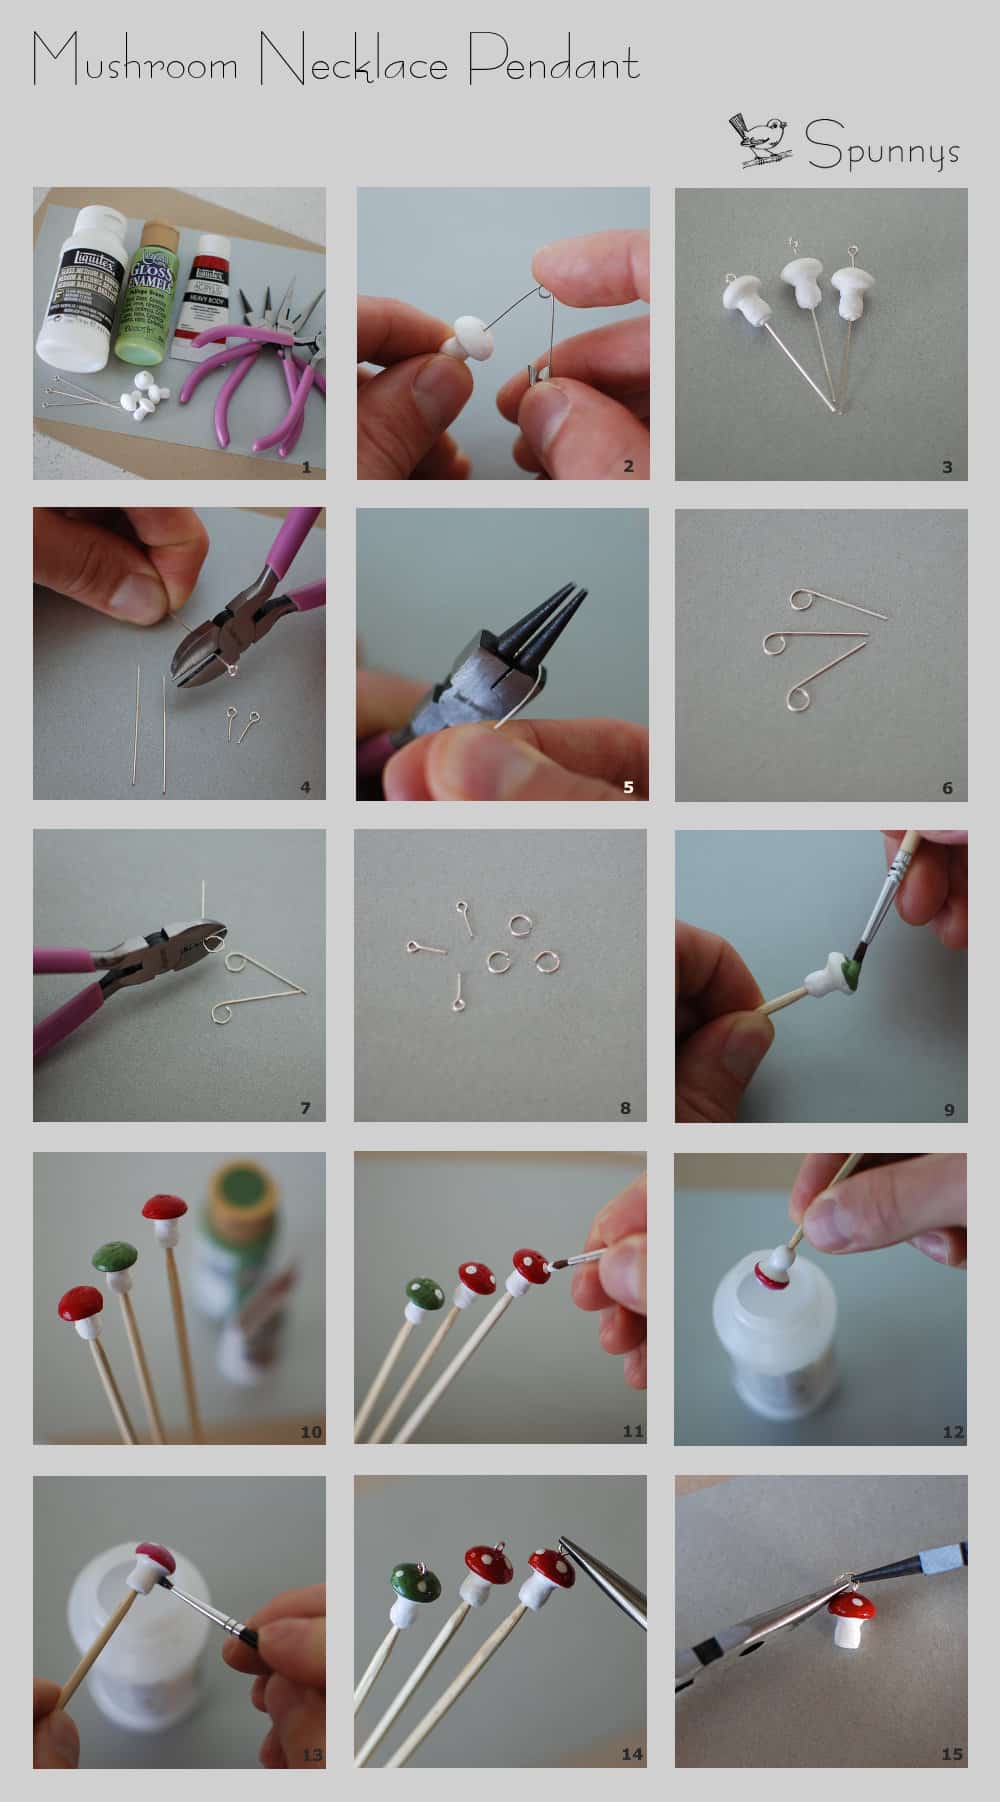
1/ Gather all your materials.
2/ With a safety pin, pierce the mushrooms from one end to the other.
3/ Slide the eye pins in the holes you just made to make sure they fit.
4/ With the wire cutter, shorten your eye pins. They need to be a little shorter than the mushrooms.
5 to 7/ Grab the cut-off portions of your eye pins. With the round nose plier, make little loops and cut them loose.
8/ Make sure you have all the hardware you need. For 3 mushrooms, you need 3 shortened eye pins and 3 little loops.
9 and 10/ Paint the caps of your mushrooms. I like to use a bamboo skewer to hold the mushrooms while I paint them. The skewers also double as neat resting stands.
11/ When the paint is dry, paint little white dots on each mushrooms.
12 and 13/ When the dots are dry, dip each of the mushrooms into a gloss varnish all the way to the bottom of the stems.
14/ While the varnish is still wet, insert the shortened eye pins into the mushrooms caps. Push down on the pins to make sure the eye parts get in contact with the varnish. While the varnish dries, keep your mushroom as upright as possible otherwise the varnish may be thicker on one side of the cap than on the other.
15/ When the varnish is dry (it may take a few hours, maybe even an entire day depending on what varnish you used) add the little loops to each of your mushrooms. I used two pliers to open and close the loops.
16/ Tear drop finish (OPTIONAL). When you are done, you can dip the bottom of the mushroom pendant into mod podge and let it dry in an upright position. It will cover the hole at the bottom of the mushroom and give it a nice tear drop finish.

YOU ARE DONE!
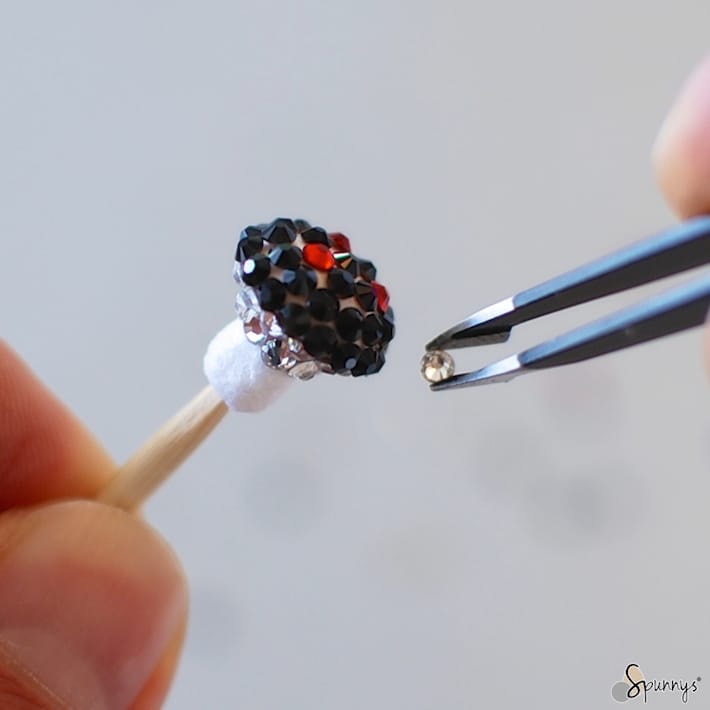
Project variation: Swarovski crystal mushroom necklace pendant.
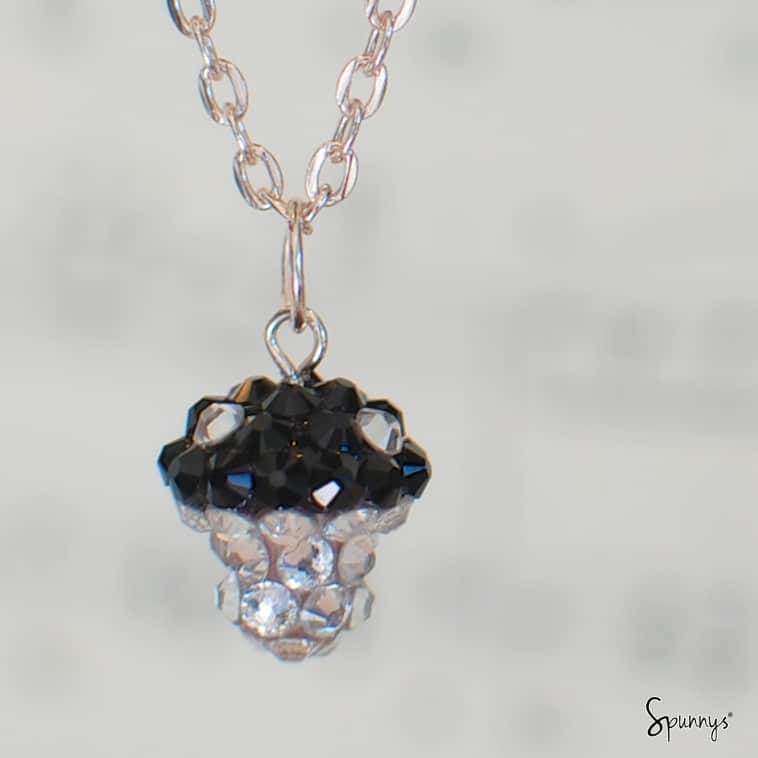
I hope you enjoyed this tutorial. Note that you can also use the same technique to make mushroom earrings or bracelet charms. Happy crafting and as always, let us know if you have any questions!