Looking for a fun and creative craft project? In this step-by-step DIY tutorial, you’ll learn how to make miniature pipe cleaner hats using simple materials and an easy weaving technique.
With just a little practice, you can create beautiful mini hats in about 5 minutes each — perfect for:
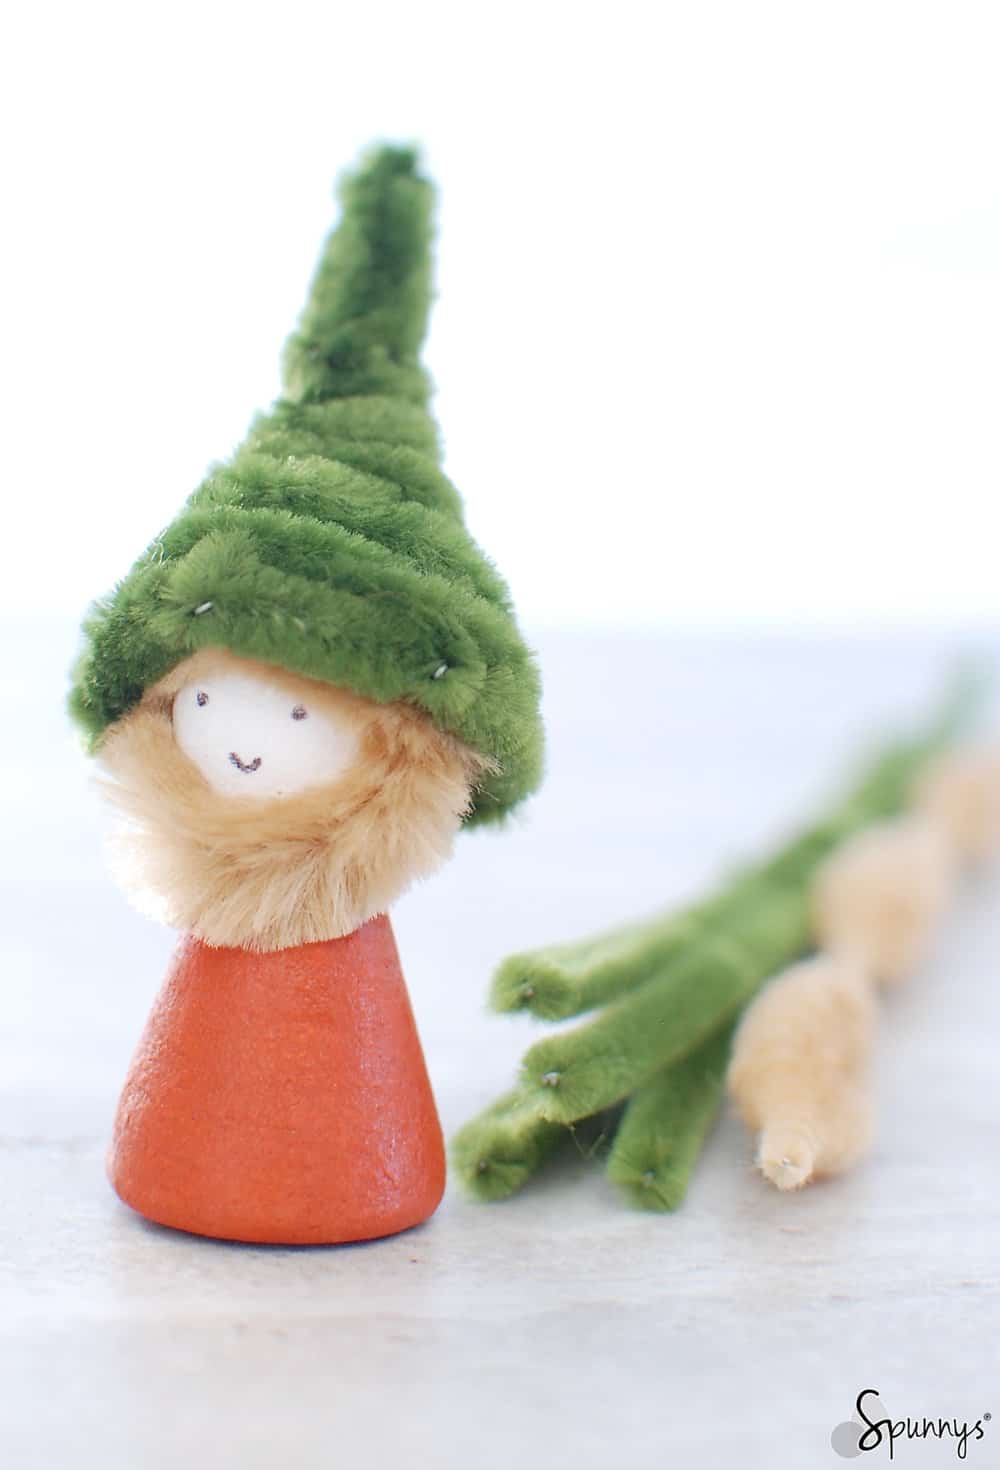
- Peg dolls and figurines
- Holiday decorations
- Miniature ornaments
- Gnomes, elves, and craft characters
Once you master the basic technique, you’ll be able to make many different hat styles for all seasons and themes.
One Simple Technique – Endless Hat Styles.
Using this easy pipe cleaner weaving method, you can create:
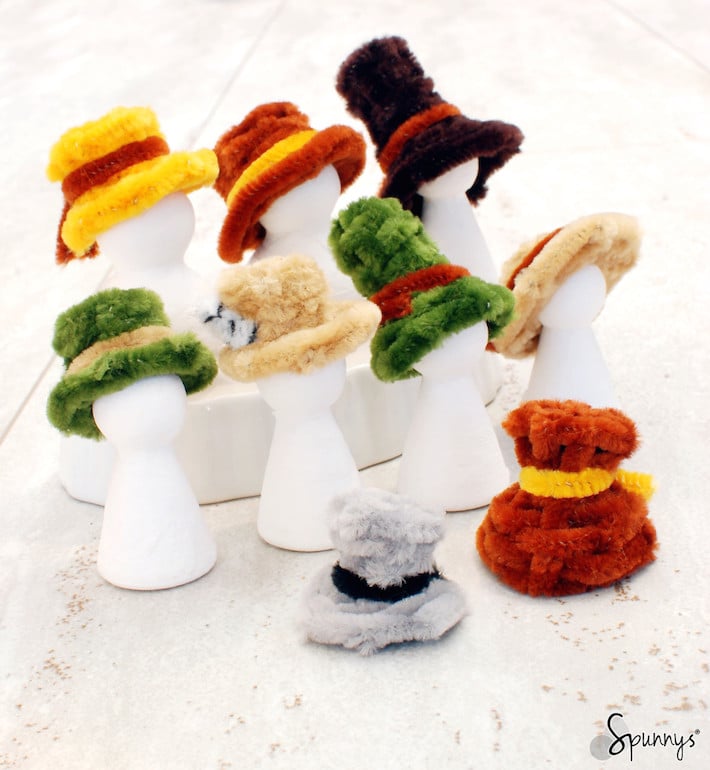
🎅 Santa hats
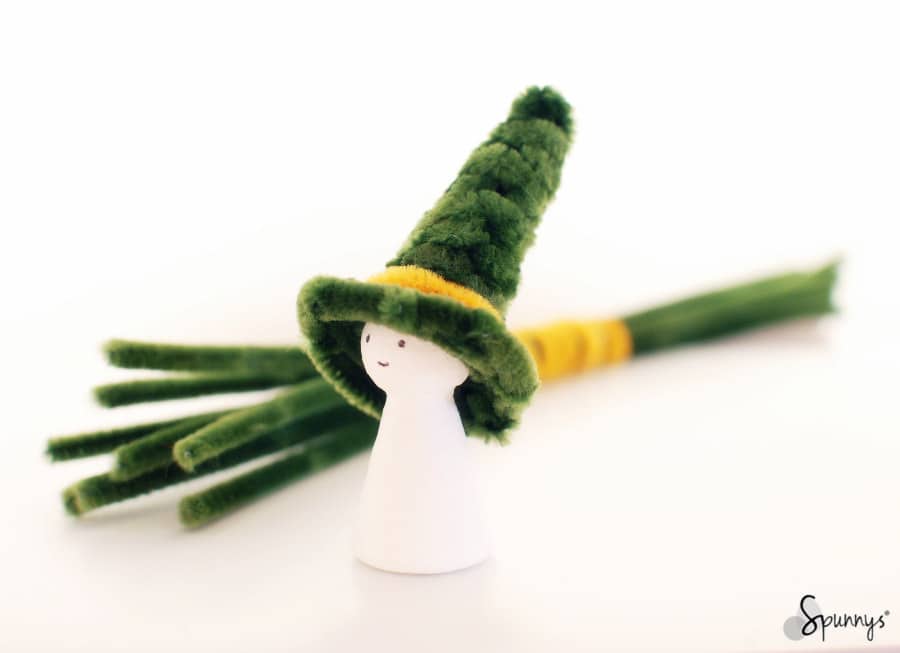
🧙 Wizard hats
🍀 Leprechaun hats
🎩 Mini top hats
☀️ Sun hats
🧢 Beanie hats
👒 Cloche hats
🚣 Boater hats
…and many more creative designs!
Just adjust the crown height, brim width, and shape to customize each miniature hat.
Materials Needed for Mini Pipe Cleaner Hats
Each miniature hat requires:
- 4 to 5 pipe cleaners (chenille stems)
- Wire cutters
- Pliers
That’s it — no glue or extra supplies needed!
Choosing Your Pipe Cleaners
You can use many different types of pipe cleaners, such as:
- Regular pipe cleaners
- Plush or fuzzy pipe cleaners
- Glitter pipe cleaners
- Bump pipe cleaners
- Narrow or wide stems
For this tutorial, we used standard pipe cleaners (12 inches long, about 6 mm wide).
Pipe cleaners are inexpensive and great for experimenting with colors, textures, and patterns.
Step-by-Step Miniature Pipe Cleaner Hat Tutorial
To illustrate the technique, we are going to make a simple hat. You can then modify this basic technique to make different styles of hats.
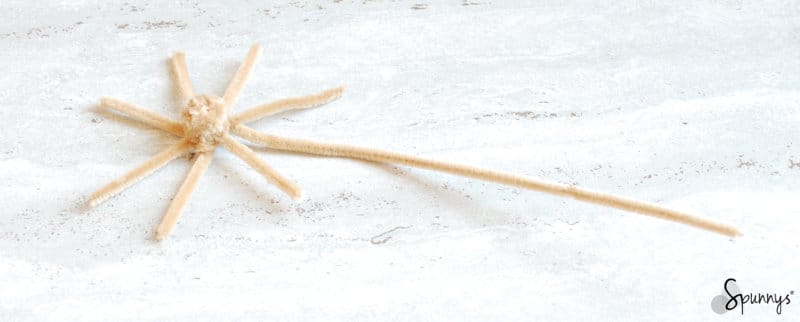
Step 1: Gather Your Pipe Cleaners
Start with 5 full-length pipe cleaners.
Step 2: Cut Two in Half
Cut 2 pipe cleaners in half, leaving you with:
- 4 half-length strands
- 3 full-length strands
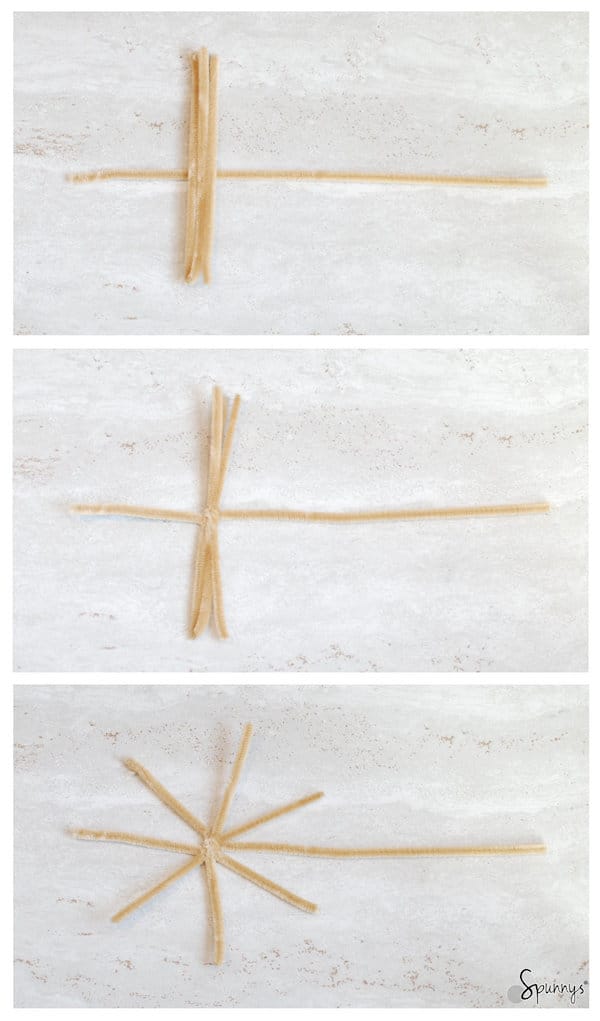
Step 3: Build the Hat Frame
You’ll create a 7-arm star shape, plus one long weaving strand.
- Lay three half strands perpendicular across one full strand
- Wrap the full strand tightly around the center
- Pull to secure
- Spread the strands evenly to form a star
This star shape is the base frame of your hat.
The extra long strand will be used to weave the hat.
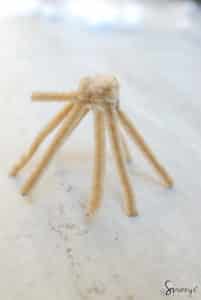
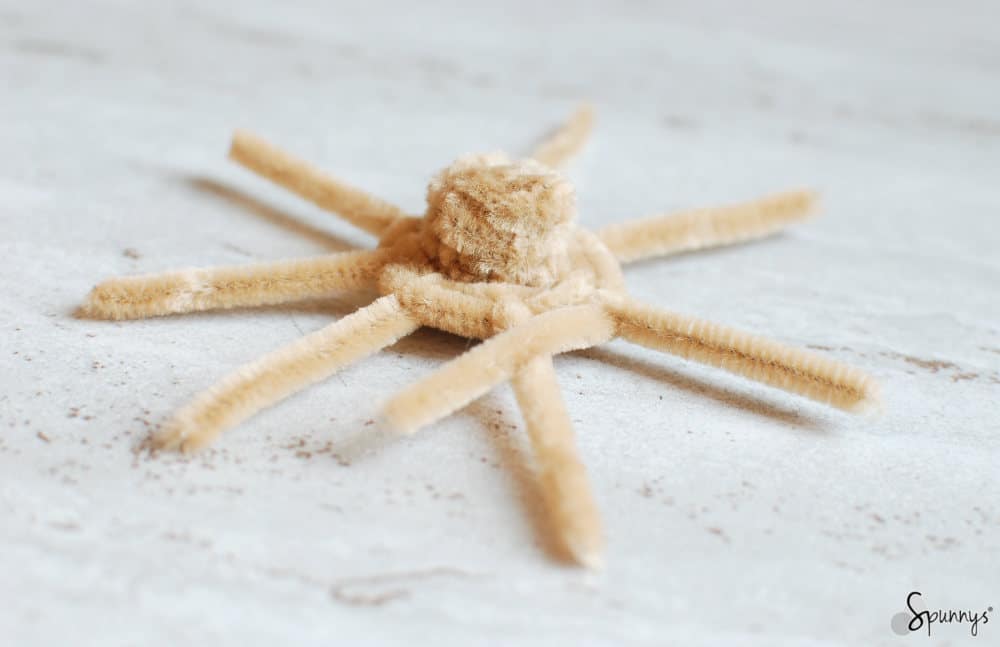
Step 4: Weave the Crown of the Hat
Take the long strand and begin wrapping it clockwise around the center:
- Go over one strand, then under the next
- Continue alternating over and under as you circle
After a few rounds, you’ll form a small woven disc — this is the top of the crown.

Once the disc is formed:
✔ Bend the 7 arms downward
✔ Continue weaving around them to build the height of the crown

When you reach the end of a pipe cleaner, simply twist on a new one and continue weaving.

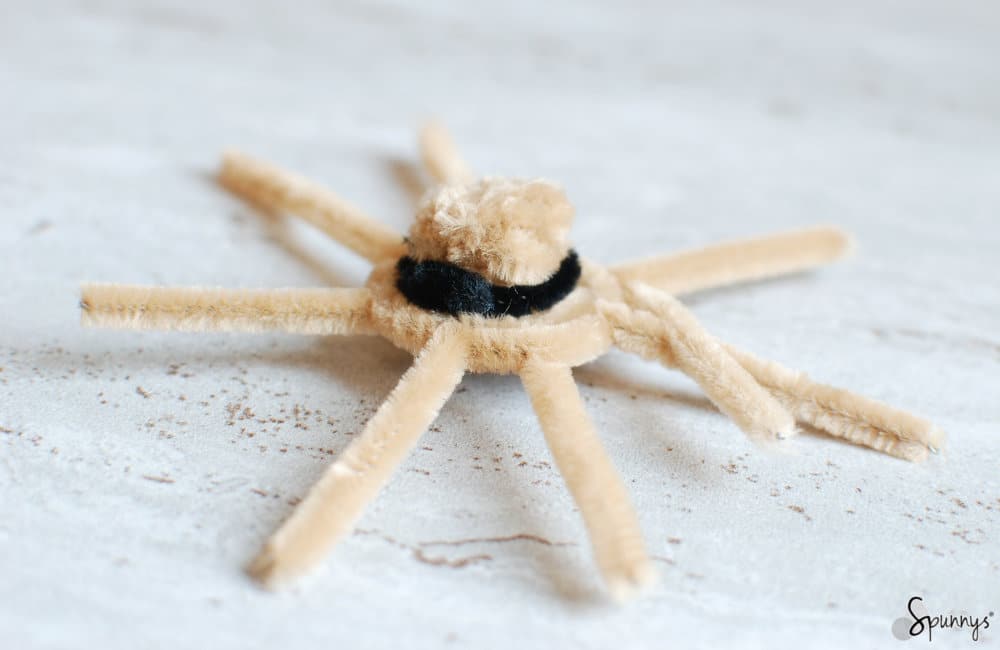
Step 5: Weave the Brim
When the crown is the height you like:
- Bend the frame arms outward
- Continue weaving using the same over-and-under pattern
This creates the brim of the hat.
Finishing Touch
Before trimming the ends:
👉 Fold all loose ends under the brim first
(This prevents metal tips from sticking out)
You can also add a decorative band using another pipe cleaner wrapped around the crown.
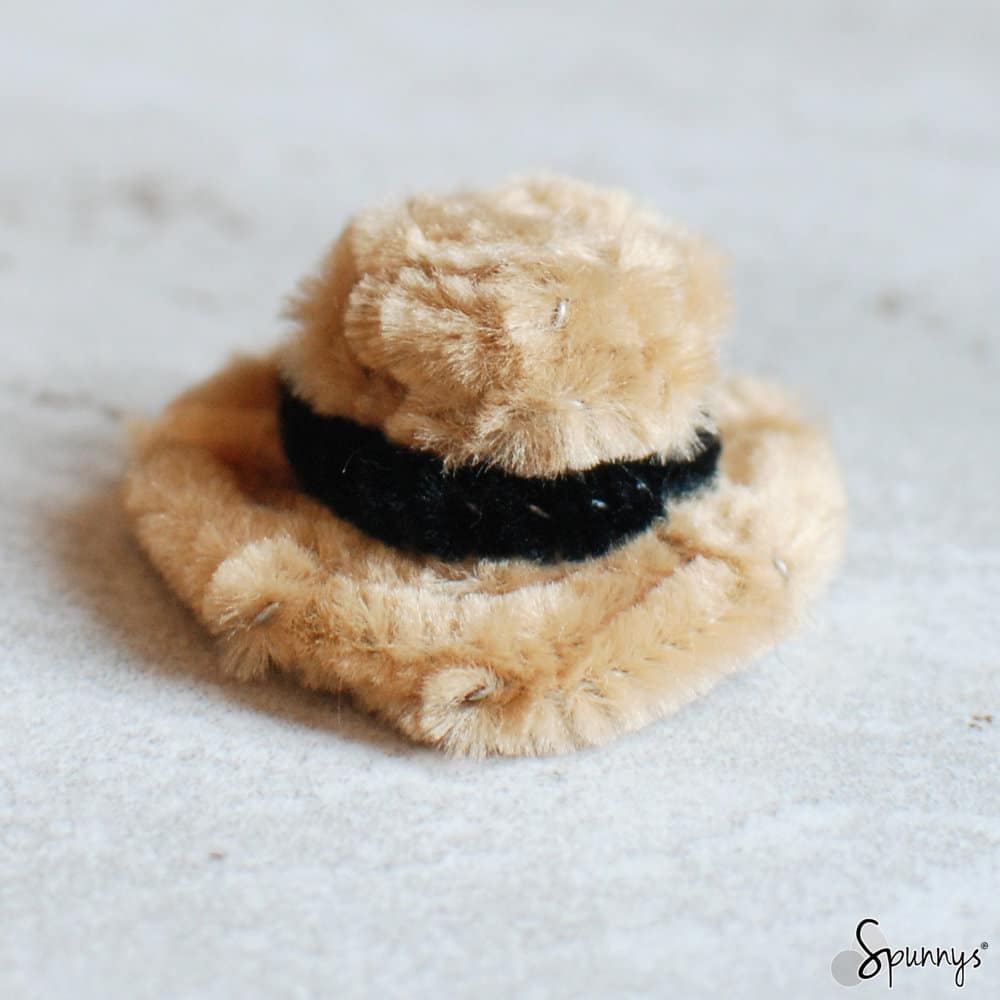
🎉 Your miniature pipe cleaner hat is complete!
Now try:
- Taller crowns
- Wider brims
- Pointy hats
- Flared shapes
- Mixing pipe cleaner textures
Take Your Mini Hats Further with Craft Shapes & Decorations
Mini pipe cleaner hats look even better when paired with:
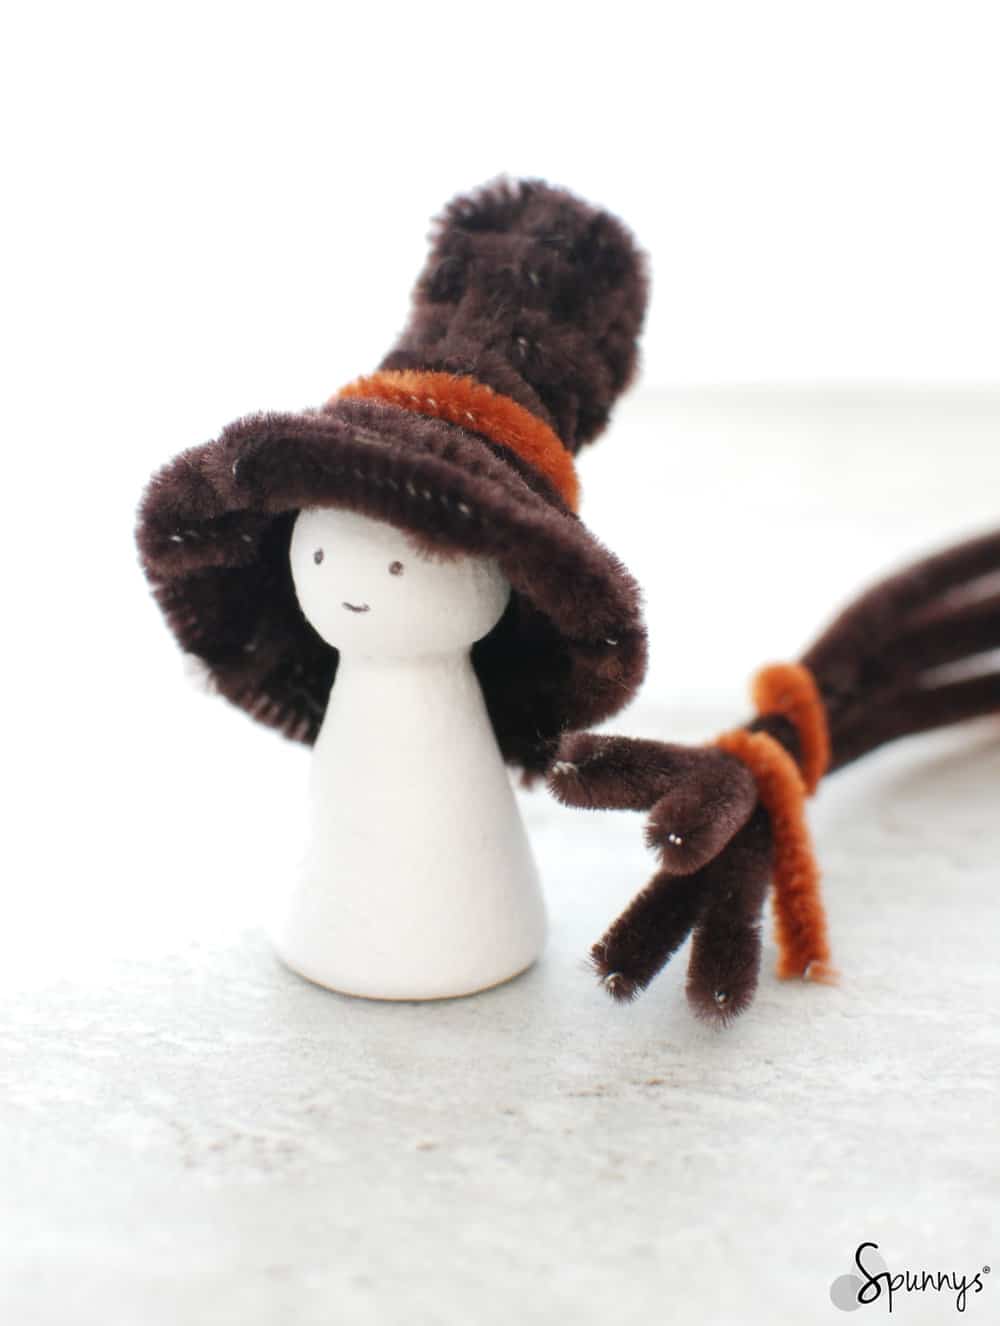
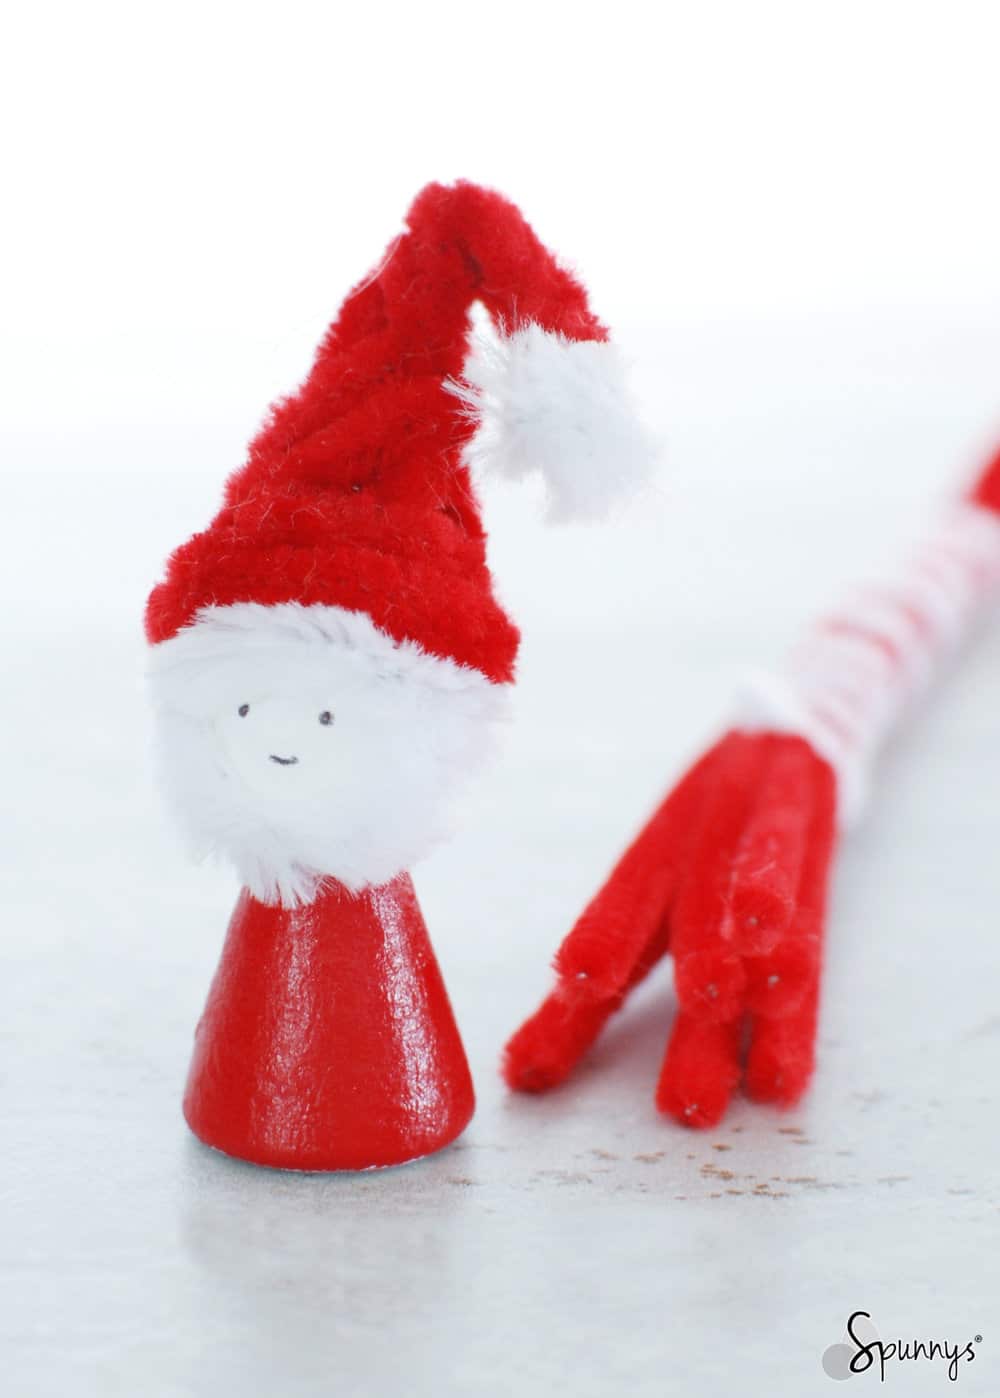
- Peg dolls and figurines
- Spun paper balls for heads and ornaments
- Craft shapes for characters, gnomes, and holiday décor
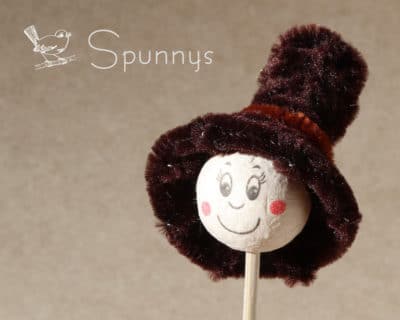
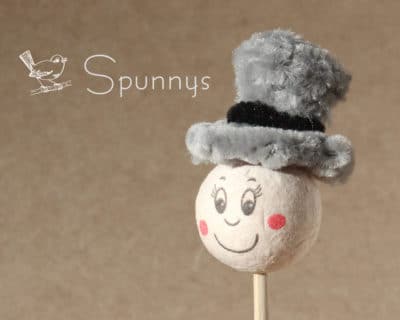
Using lightweight spun paper balls makes it easy to create:
🎄 Christmas ornaments
🎃 Halloween figures
🐰 Easter decorations
🧝 Mini gnomes and elves
They’re perfect for turning your miniature hats into full craft projects.
More Miniature Craft Ideas
Here are a few fun ways to use your mini pipe cleaner hats:
- Santa peg doll ornaments
- Gnome decorations
- Mini character figurines
- Holiday table décor
- Handmade gifts
We hope you enjoyed this miniature pipe cleaner hat DIY tutorial!
If you have any questions, feel free to leave a comment below — we’re always happy to help.
Happy crafting!
Thank You so much for this pattern. I have been looking for these, it seems like forever. I am making Snowmen, Santas, and Nut Crackers for Christmas. Now I can finish them.
Thank you for your comment Tina!
A basket weave, how clever. So much prettier with a textural look than a piece of fabric or colored cardboard. I am impressed!!! Thank you for your kindness in sharing this technique.
Goes straight to my heart, thanks Laura. I didn’t realize this was a basket weave technique :) Now I have a name for it!